Herb Wreaths

sourdough and sage and artemesia wreaths 011


It is mid September and that is the perfect time to make wreaths with all the overgrown herbs in your garden.

sourdough and sage and artemesia wreaths 005 sourdough and sage and artemesia wreaths 007 sourdough and sage and artemesia wreaths 006 sourdough and sage and artemesia wreaths 009

The nice thing about making an herb wreath is the fragrance that surrounds your enterprise!  I was enveloped in sage- aroma, oils and thoughts (hopefully) whilst making these wreaths. The sage wreath turned into a heart- it was predetermined in its growth pattern.  The artemesia was happy to be a circle.

sourdough and sage and artemesia wreaths 010

Next, I’m making lemongrass wreaths!

Knitting and felting bowls

pie and Aidan in the sunshine 005

Willow asked for some felted bowls for her birthday.

I made five.  I have a real hard time choosing just the RIGHT one of anything- so I always make more so you can choose or just take the whole lot! πŸ™‚

Willow wisely chose the whole lot- and they really all turned out quite lovely.

bread nd yarn 002 salty nutty bars 008 salty nutty bars 002

They started out  quite large- then I gave them a hot water bath in the washer-

bowls and eggs and savory pastry 001 bowls and eggs and savory pastry 006 bowls and eggs and savory pastry 007 bowls and eggs and savory pastry 013

And presto -chango- they became tight and compact bowls needing only to be blocked into an appropriate shape.

bowls and eggs and savory pastry 016

I added a little felted bee to the inside of this one-

bowls and eggs and savory pastry 017 Just BEE’cause I wanted to and I could!

bowls and eggs and savory pastry 015

Happy Birthday, Willow-  you have the whole month of September to celebrate!

Between recipes- knitting around the edges…

knitted 002 I am taking a small break from cooking-

not really- I am taking a small break from writing about cooking.

I’ve been cooking/baking by day and knitting by night.

Knitting within my small capacity to understand directions.

I think my disability comes from my inability to count.

I could never do counted cross stitch because I would get lost and muddle about the cloth- making random crosses here and there- looking more like chicken scratches than anything else.  The same is true for knitting a pattern- I certainly start well, but then I lose count.

Then I lose patience.

Then I lose heart.

And I stop.

But, I did manage to knit an entire pair of socks.


 knitted 003

And I can knit a hat and scarf-

knitted 006

knitted 005

And I knitted a purse, which I felted and now need to knit the handle and embellish the purse with wool.

I knit a lot like I bake- following a form but fitting it to my style and interests and tastes.

I am a woman of small and humble talents.  But sometimes that is enough to make one contented.   And armed with a camera and a small way with words and access to the internet , those talents almost look impressive.

Before I dazzle you anymore with my many accomplishments, I am going to stop- mainly because I’ve run out of pictures.  ( I have rarely run out of words.)

I’ll be back tomorrow with more recipes to share.

Lavender- Culinary and otherwise and a recipe or two

Recipe #1 

Lavender Cookies

Ingredients

2 teaspoons culinary lavender flowers
2 cups all-purpose flour
11/2 teaspoons baking powder
1 pinch of salt
6 tablespoons butter
1/3 cup shortening
3/4 cup sugar
1 egg
1 tablespoon milk
1 teaspoon vanilla

Instructions

Pre-heat oven to 375ΒΊF.
Stir together flour, baking powder and a pinch of salt. Set aside.
Beat butter and shortening for 30 to 60 seconds. Add sugar and lavender buds. Beat till fluffy. Beat in egg,
milk and vanilla. Add the dry ingredients to the mixture. Beat until well-combined.
Drop teaspoonfuls of dough onto an ungreased cookie
sheet about 2 inches apart. Bake for about 10 minutes or until golden-brown. Serve with hot tea.

………………………………………………………………………………………………………..

Sorry – no picture to go with that one.  It is too hot to bake in the oven, today.

And I have heard some people say recently that eating lavender was not appealing to them.  So, I didn’t want to push the matter, but I thought I’d look into the use and cultivation of culinary lavender.  And I think it may be that all culinary lavender is not equal.

In order for lavender to be sold for culinary purposes, it has to be grown as an agricultural crop- (human safe insecticides and fertilizers, etc)  and it has to be harvested and processed differently than lavender used for aromatic purposes.

That is all well and good ( and expensive)- but I wanted to come up with my own harvested culinary lavender, and that is where I discovered some things on my own.


lavender and Aiden 008

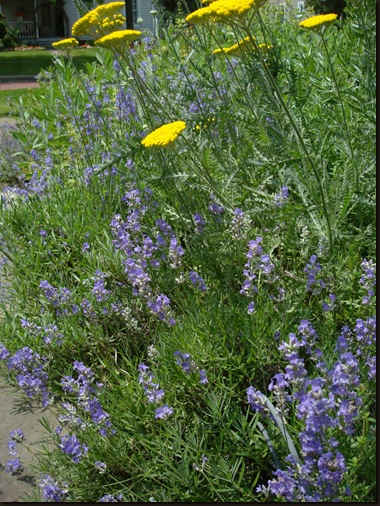
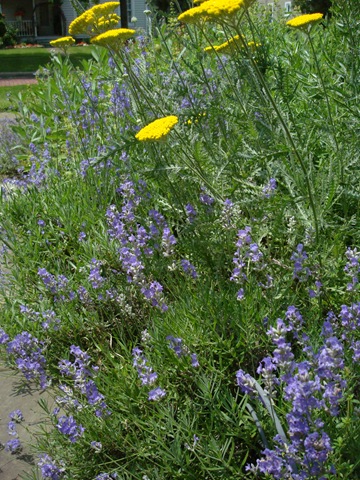
Lavender grown in your own hedge or bed is acceptable for culinary use.

As long as you don’t treat it with insecticides or sprays.  And it is in the harvesting that the distinct difference can be seen.


lavender and heirloom tomatoes 010

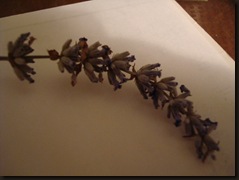
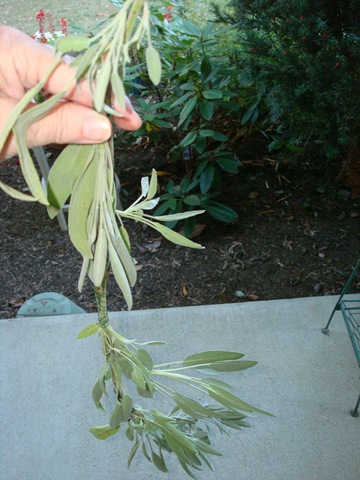
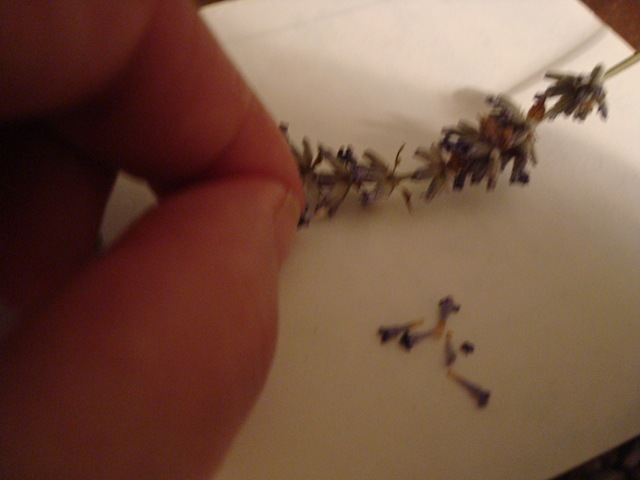
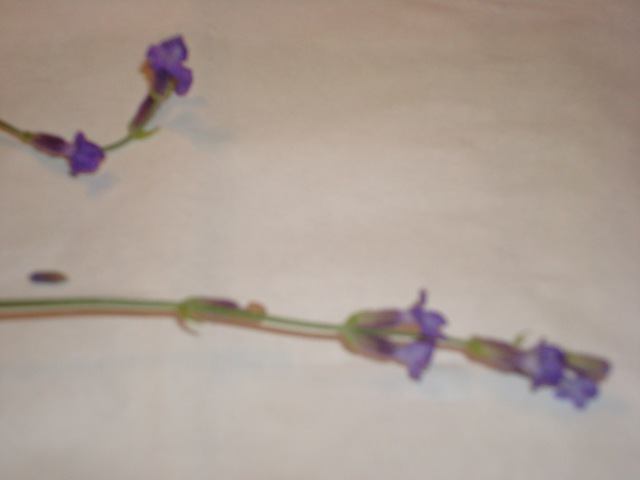
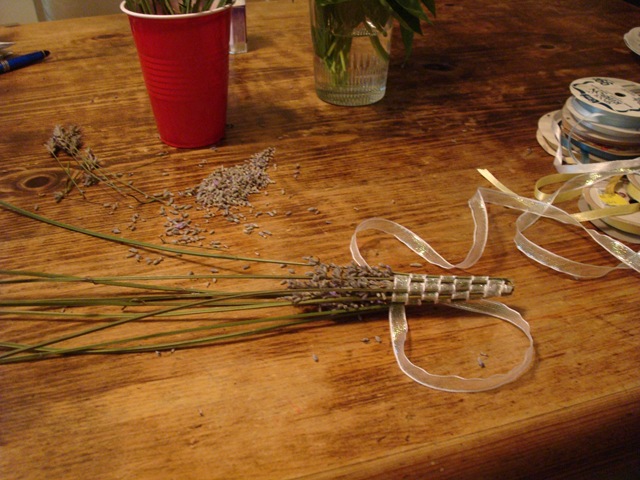
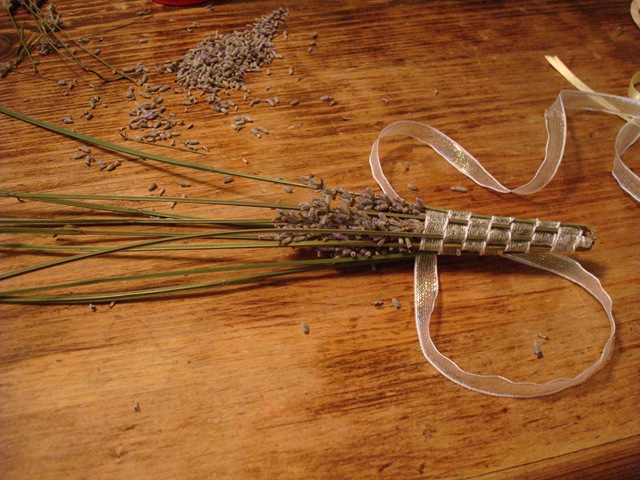
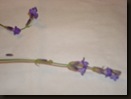
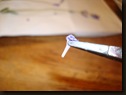
dried stem of lavender

As you can see from this single stem above, there are several components to the lavender flower.  The head or spike above contains many flowers or corollas.  In order to use the flowers without overpowering your recipe, you must remove the flower from the calyx.

 lavender and heirloom tomatoes 011 lavender and heirloom tomatoes 012

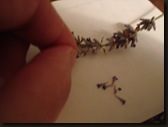
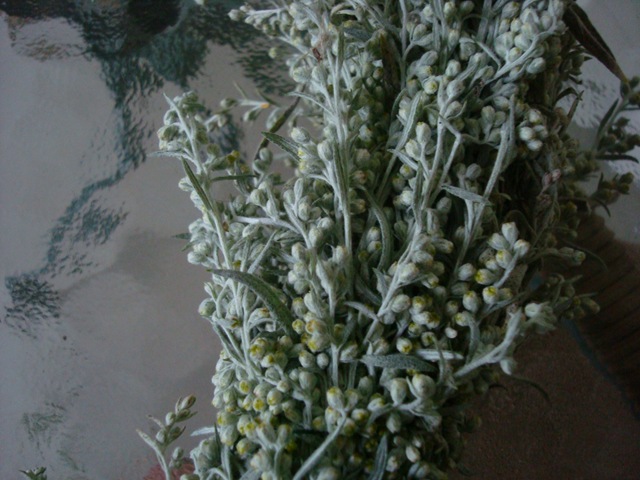
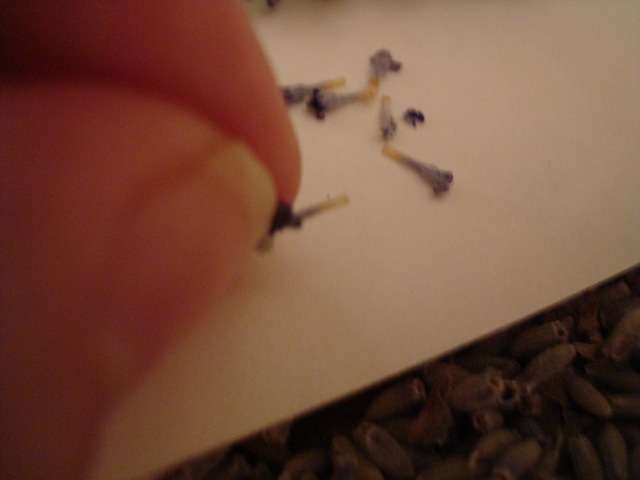
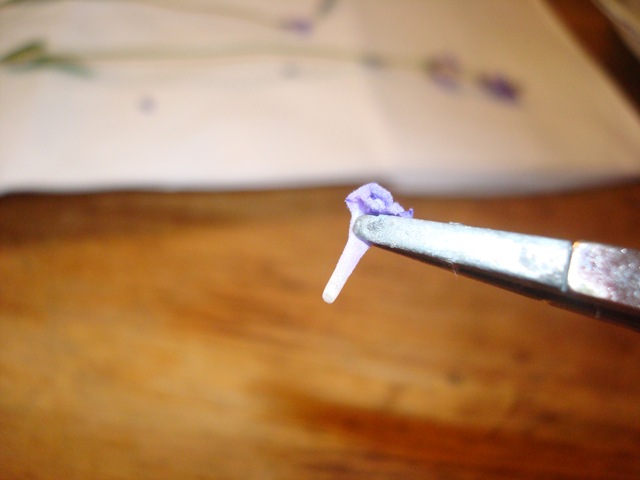
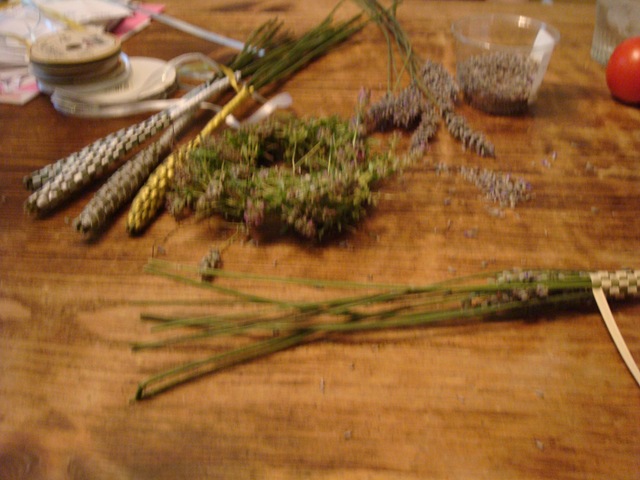
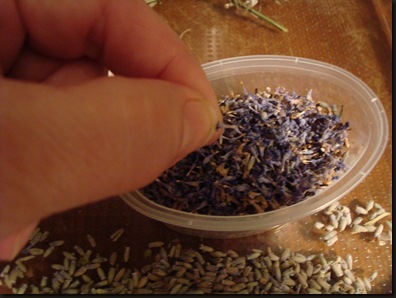
lavender florets or corollas

Once separated, save the calyx for use in sachets or potpourris-

lavender and heirloom tomatoes 004

this is painstaking and patient work- I found doing it when my husband watched baseball worked for me- it takes about as long as a baseball game lasts to get more than a few tablespoons of usable lavender flowers.

lavender and heirloom tomatoes 007

lavender and heirloom tomatoes 009

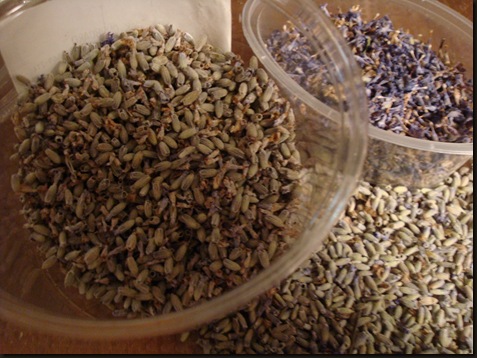
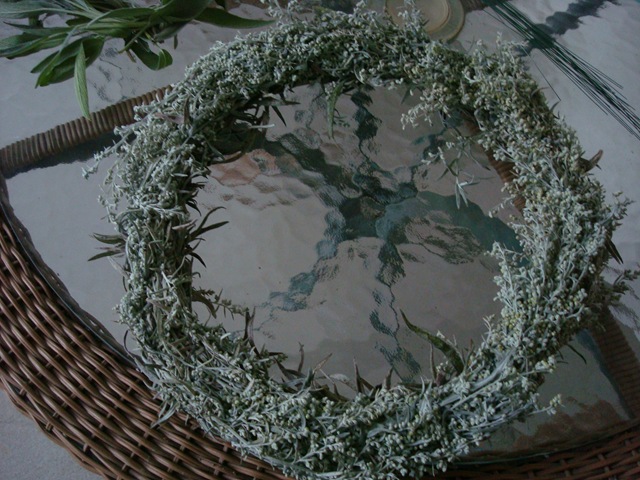
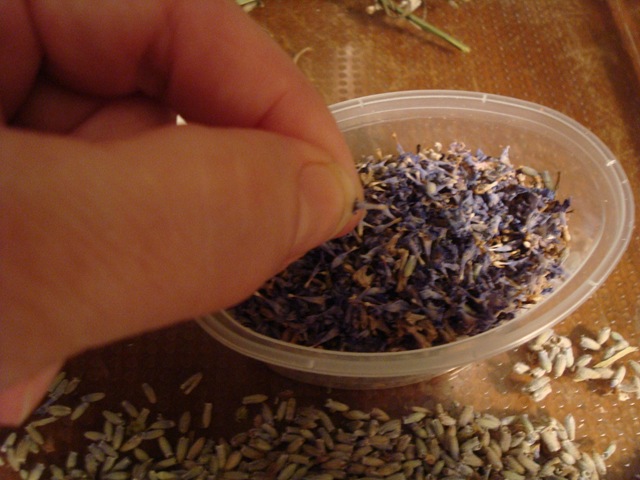
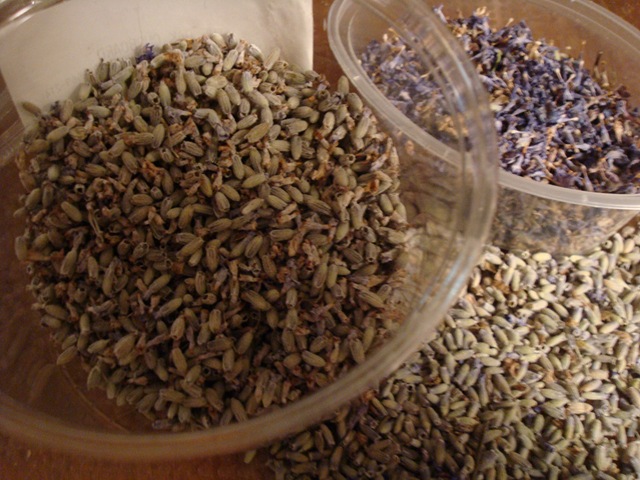
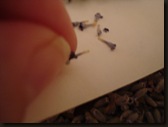
flowers and calyx- calyx alone- flower or corolla

Look at the difference in just appearance.  The scent is mainly contained in the calyx and the flowers fragrance is much more subtle.  The flowers also have the bluest appearance of the three.

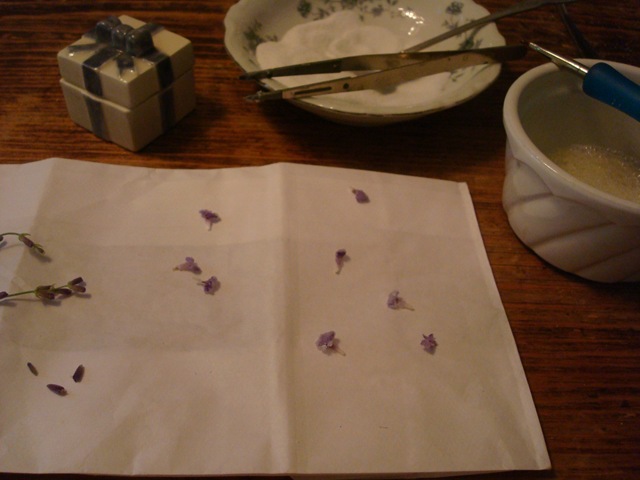
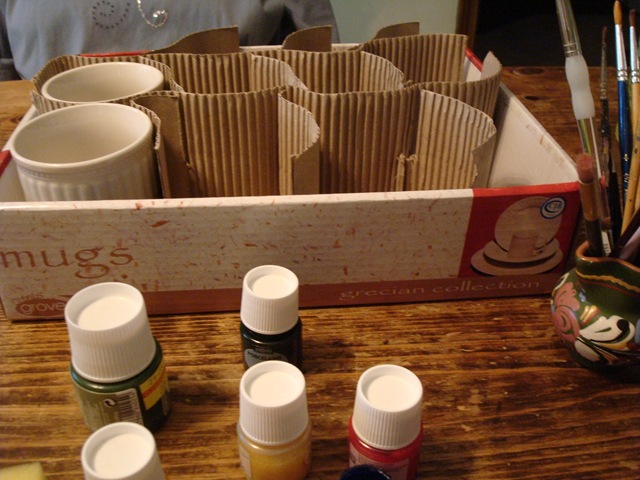
I also crystalized some of the fresh flowers.  I usually do violets in the spring, so I thought it wouldn’t be too difficult to adapt that process to lavender florets.

HAH!!

It was ridiculously hard.  I managed to get eight florets done in a half an hour.

lavender and heirloom tomatoes 019 separating the florets-

lavender and heirloom tomatoes 020 
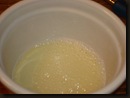
preparing the egg white-

lavender and heirloom tomatoes 033 processing the sugar to be super-fine-

lavender and heirloom tomatoes 024 tweezering the florets-

lavender and heirloom tomatoes 025 
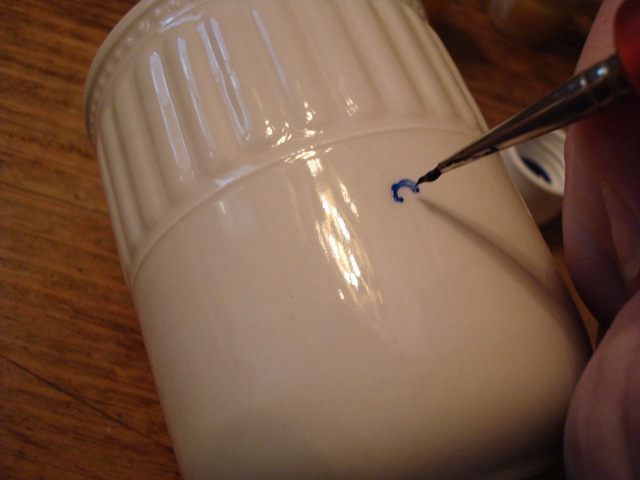
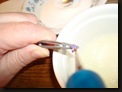
painting outside and inside with egg wash-


lavender and heirloom tomatoes 026 coating with sugar-

lavender and heirloom tomatoes 030 
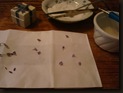
drying and baking the florets

in a cool oven-

(sorry, I forgot to take a picture of the baking stage! πŸ™‚

lavender and heirloom tomatoes 031 
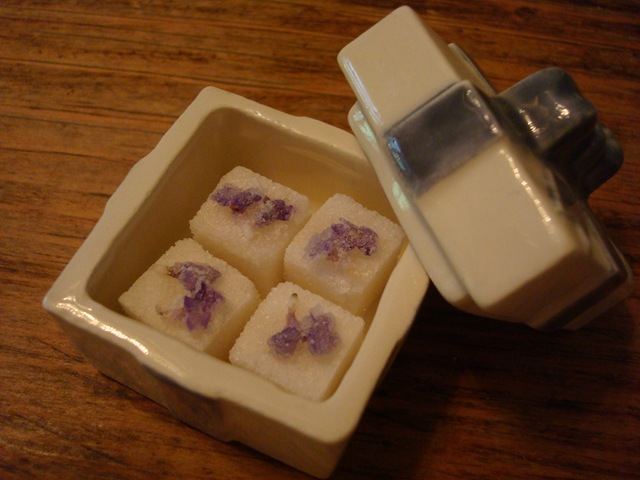
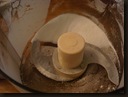
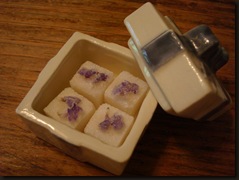
and finally attaching to sugar cubes for a decorative effect. 

Here is my second recipe.

  lavender and scones 015

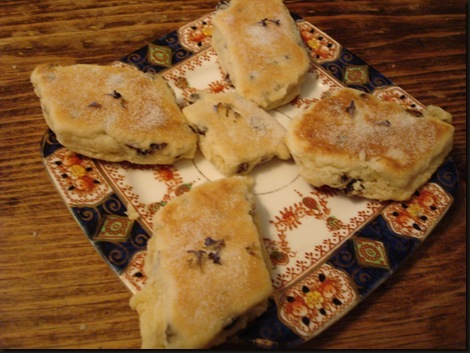
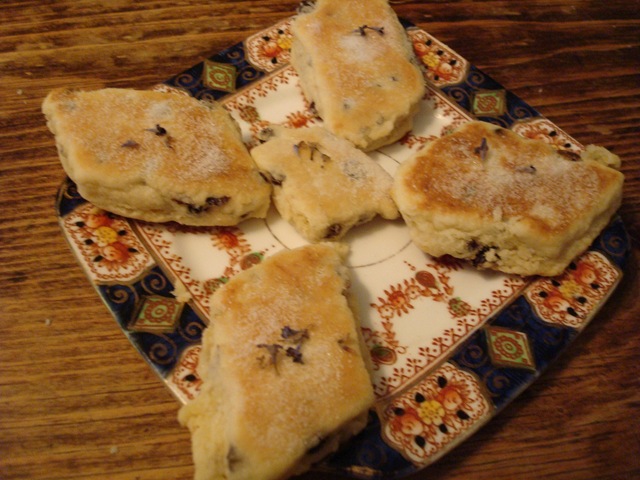
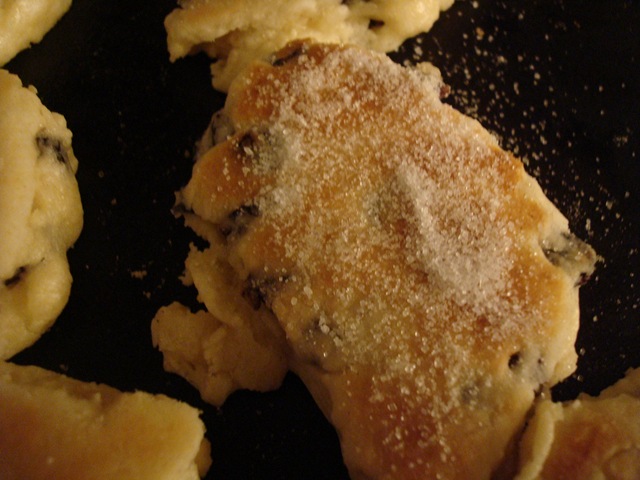
Welsh Scones with lavender and currants

Ingredients:

8oz. (1 cup) self rising flour

4 oz.  (1 stick) butter, cold

pinch of sea salt

4 oz. (1/2 cup) dried currants

1 tsp. lavender,culinary, flowers only

2 TBS. fine sugar

1 egg

1 TBS buttermilk

more sugar for the topping.

lavender and scones 001 lavender and scones 002 lavender and scones 003

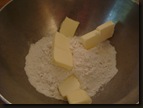
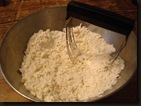
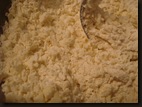
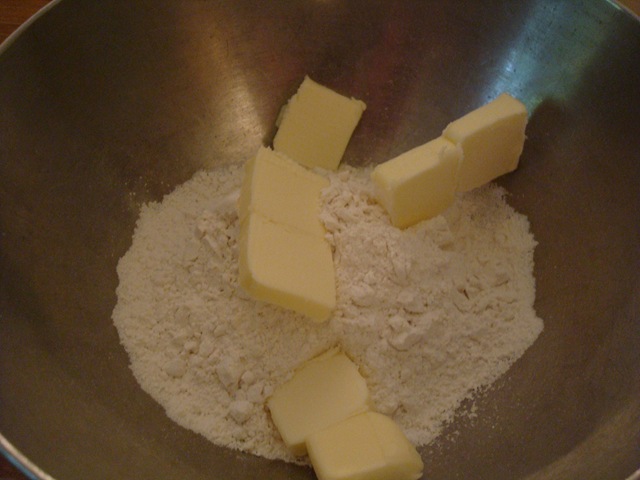
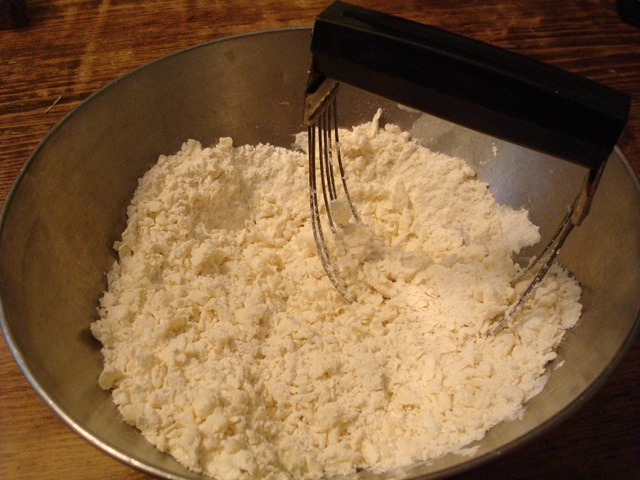
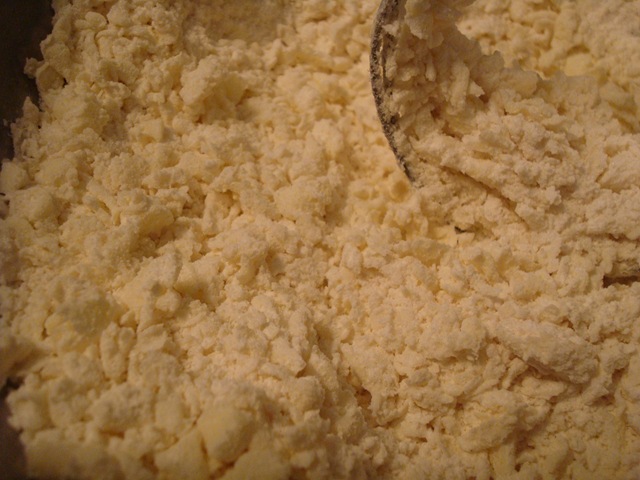
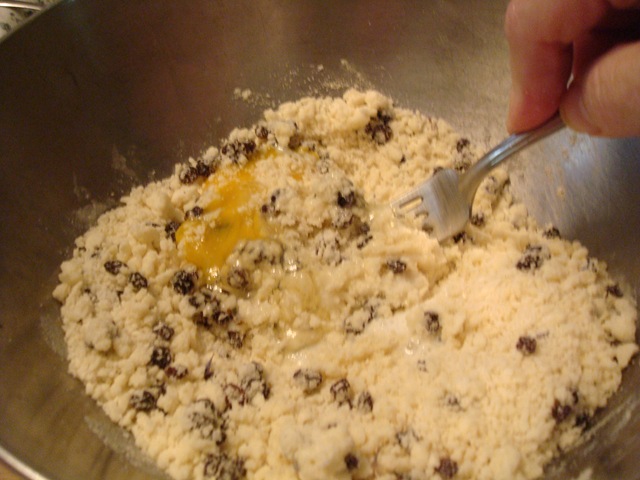
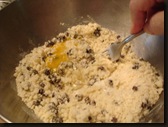
Cut butter into flour until looks like corn meal-


lavender and scones 004 
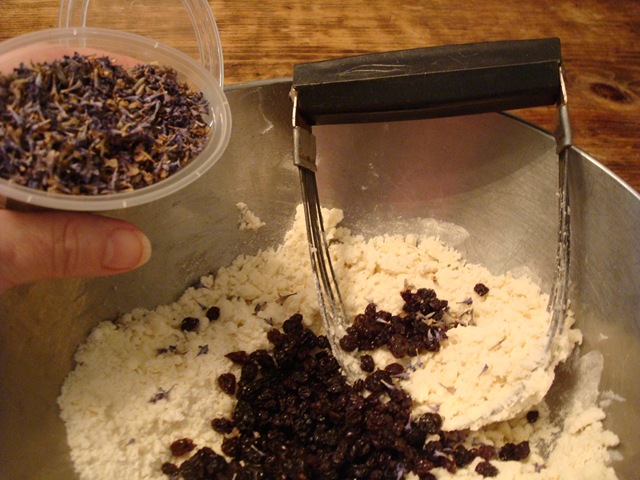
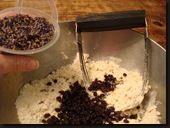
add salt, currants, lavender, and sugar.

lavender and scones 005 
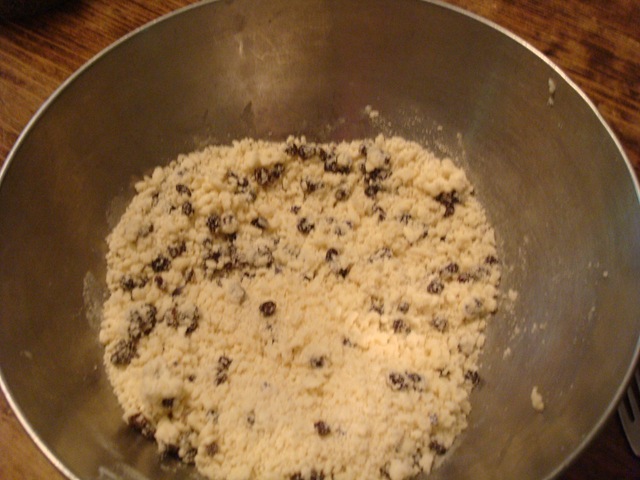
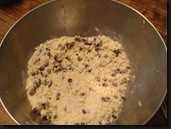
Stir so that currants are coated with flour and not in clumps.

lavender and scones 007 lavender and scones 008

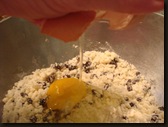
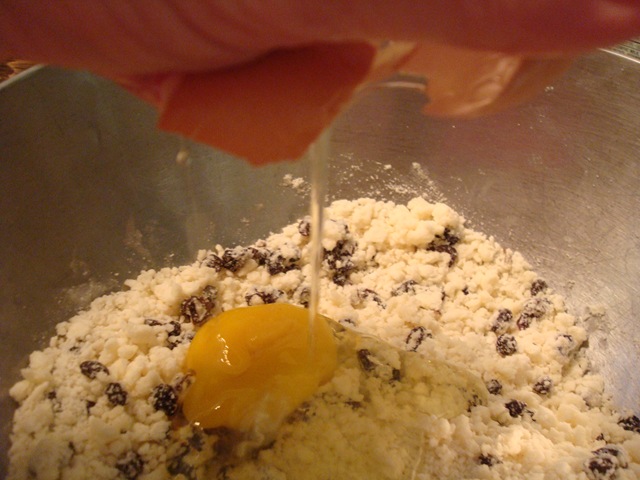
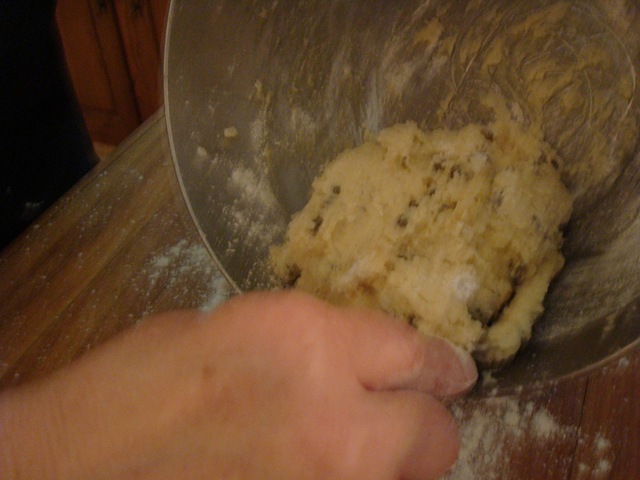
Add egg and buttermilk and stir gently, until completely moistened.

lavender and scones 009 
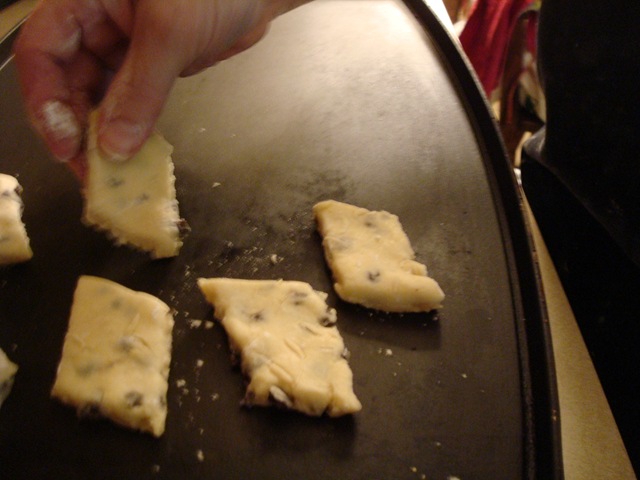
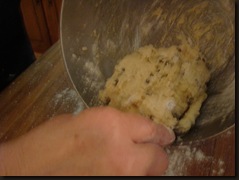
Dump out onto pastry board and pat gently into a 9 x12 rectangle and cut into diamond shapes.

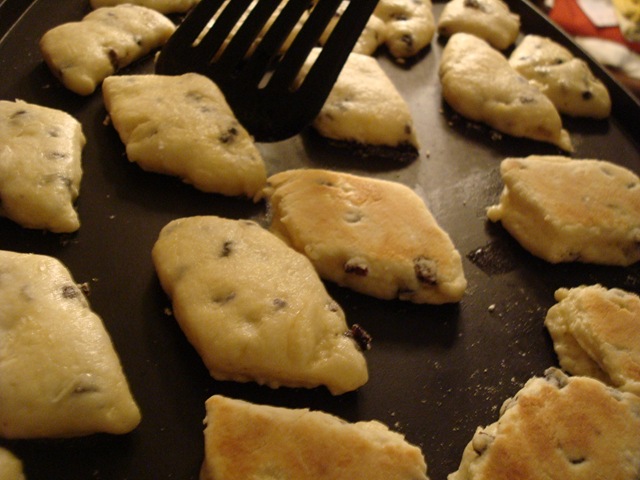
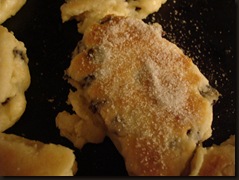
Then put onto a medium hot griddle  and cook until slightly browned on one side.lavender and scones 010 lavender and scones 011

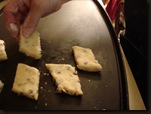
Turn over and cook on the other side, sprinkling a little sugar on top.

lavender and scones 014 lavender and scones 013

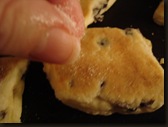
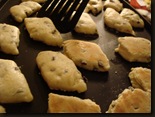
These are so light and delicious!

Very More-ish as my friend, Celia, says!

I think the flour is just there to hold the butter into an edible shape, really!

These have been called Welsh Scones, Griddle cakes, and Singin’ Hinnies-

I call them magnificent.

I’ve never had a scone that topped these for lightness or flavor.

You can leave out the lavender if you like, but make these scones.

You won’t be sorry.

Lavender wands and other stuff.

lavender wands2010 001

First, I’d like to apologize for the long silence.

I was waiting for a guest blogger to fill in the space.

My husband wanted to do the Sunday Psalm series on benedictions and blessings throughout the scriptures.  So I waited for his input.

He has been so busy that although he kept assuring me he would get it done- well….

So I just kind of went off in another direction and played with lavender this weekend.  And I made wands and a pretty candle wreath of thyme and lavender.

lavender wands2010 002  +lavender wands2010 003 =


 lavender wands2010 004 lavender wands2010 005


lavender wands2010 007

My kitchen smelled wonderful!

lavender wands2010 001

And I now have lavender woven into sweet scented wands.

Painting cups

Mugs-sailors rest 001 Mugs-sailors rest 002 Mugs-sailors rest 003 Mugs-sailors rest 004 Mugs-sailors rest 005 Mugs-sailors rest 006  Mugs-sailors rest 009 Mugs-sailors rest 010 Mugs-sailors rest 011 Mugs-sailors rest 012 Mugs-sailors rest 013 Mugs-sailors rest 014

I meant to put up one (1) picture and the picture wizard went crazy and put them all up! 

TA DA!!!

This is what I did this afternoon-  the mugs down at the house in Chincoteague (The Sailors Rest) are HUGE!  Even bigger than the mug I have in the picture immediately above with the red knitted cup cozy around it!   So large that your coffee gets cold- you go into diabetic shock from the amount of hot chocolate- and the tea in the cup ends up being iced tea rather than hot.

So- I saw the smaller mugs on sale for $.50 each and I bought them. 

The problem with that is that I had a small vision when I looked at them in the store.  I saw them with a small anchor logo and the name of the house on them.

And I heard Jean-Luc Picard’s voice in my head saying, “Make it so.”

OK– I didn’t have any Star Trek voices in my head, but I really did flash on the logo thing and it seemed like I should do it.

So I got out my ceramic paints and did it.

They have to cure for 24 hours and then I will bake the logo onto the cups.

I am so glad I only bought a dozen.

What do you think of the cup cozy?  I knitted it in wool and felted it. 

I’m thinking Christmas presents with a package of  Heidi’s Homemade Gourmet Hot Chocolate and a HUGE mug with a personalized touch painted on it, and of course a felted wool teacup cozy.

A last minute decorating idea- a quick and easy table centerpiece for Christmas and your holiday entertaining

Christmas Eve 147

I made this up in about 15 minutes- tops!

It  costs almost nothing- and you can make more than one and add your own special touches and interests.

Christmas Eve 101 Start with a 12 inch piece of 2×4. 

Christmas Eve 103 Christmas Eve 104

Pound in 5 -3 1/2 inch galvanized nails- one in the center and 2 diagonally on each side.Christmas Eve 106 Gather up clippings from evergreen bushes,pinecones, shells, magnolia leaves, and 5 pieces of fruit.

Christmas Eve 109 Christmas Eve 113 Christmas Eve 122

Layer yo ur greens on top of the board- being VERY CAREFUL NOT TO IMPALE YOUR HAND ON THE NAILS!  THERE ARE FIVE NAILS- COUNT THEM FIVE!!!

Christmas Eve 126 Christmas Eve 128

Then, starting with your largest fruit in the center ( I used a pomegranate, but a small pineapple or large apple would work just as well) add the fruit, impaling it onto the nails.  It will hold your greens in place and is the focal point of your centerpiece.

Christmas Eve 137Christmas Eve 142

Christmas Eve 143

This also makes a wonderful hostess gift if you are going to a lot of parties!

Christmas Eve 145 I added some candles and shells we picked up on the beach today-  and we have a beautiful table for our Christmas Eve feast!

Making Boxwood Wreaths #2

Boxwood Wreath 001 Remember this post where I said making boxwood wreaths is fun and easy?

I wasn’t telling the WHOLE truth.  Making boxwood wreaths is fun but it isn’t always easy.  The wreath I showed then was a makeshift one, put together quickly and placed where no one will touch it until time to throw it out.  And that wreath-although it will dry nicely- cannot be used another year, because it was just loosely wired into place and has no real stamina.

I felt guilty acting all craftsy without telling and showing you how to make a boxwood wreath the more formal and accurate way.

I am using the boxwood we cut in Chincoteague.  I left it outside and it has been cool enough that it hasn’t dried out yet.

You will need a pair of wire/plant shears, thin gauge wire,  a wreath frame, green ribbon and about 2 1/2 hours to complete this wreath.

Boxwood Wreath 033

Don’t quit yet.  Put on some Christmas music, brew yourself a cup of tea and create a little Christmas beauty and cheer.

Boxwood Wreath 003 Cut your boxwood into small pieces with several branches -making a lot of tips.

Boxwood Wreath 004 You will need a LOT of tips, cut to about 6 inches long.

Boxwood Wreath 006

Boxwood Wreath 007 Gather them together, arranging them by size and direction, rather like a bouquet- face the fronts of the leaves to the front so that they match.

Boxwood Wreath 009Then close your palm around them and hold them tight,Boxwood Wreath 010 Boxwood Wreath 008

So that you can wire them into a tight little bundle.

Boxwood Wreath 020 

You will need many bundles.  Only use enough wire to hold them together and twist it tightly, because you need a long wire left over to go around the wreath form.(about 8-10 inches long)

Boxwood Wreath 021 I used a straw form that I’ve had for too many years to count.  But you could use grapevine or a wire form.  Take off the plastic wrapping and wrap the wreath with ribbon.  It helps to hold the wreath together and  makes it easier  to handle.

Boxwood Wreath 022Then, start to wire your boxwood bundles onto the wreath-

Boxwood Wreath 025and wrap the ribbon securely over the wired end, locking it into place.

Boxwood Wreath 026

Boxwood Wreath 027 Add the next bundle next to the first, wire it into place and wrap with ribbon again.

Boxwood Wreath 028 Keep adding more bundles, filling in the space and covering all the bases with ribbon.Boxwood Wreath 029

You need to cinch the ribbon tightly so that it gives the bundles and the wreath added support.

This goes a lot faster than it sounds.  Most of the time spent making the wreath is put into cutting and making the bundles of boxwood.

Boxwood Wreath 030 Don’t worry about covering the back side- the nice thing about wreaths is that you are not going to see the back when it is on display.

Boxwood Wreath 031

Now, add a big bow and hang it up in a prominent place.

Because YOU made it!

Boxwood Wreath 019 FYI- no animals or insects were hurt in the making of this tutorial.  I found a cocoon on one of the stems and took it outside and gently put it into the protection of an arborvitae tree.

This wreath will dry perfectly and if packed carefully can be used for several years to come.

Countdown to Christmas- Crafts

 image

Making a boxwood wreath from the clippings from the hedge in Chincoteague was our recreation while at Meredith’s house.  We started with a grapevine wreath for the base and then jammed as many long pieces of boxwood into the frame that would fit.

image

Then we made smaller bunches of the tips and magnolia leaves and pods, hydrangea flowers and rosemary bunches and rosehips growing around the beds at the house, and using a paddle of wire wrapped them tightly around the wreath base ,”taming” some of the wilder branches of boxwood we had jammed in previously.

image

We layered the bunches and the decorative pieces around the wreath to make it look well covered and uniformly designed.

image

Then added a bow and it was ready to hang.

 Click to View My Photo

And we used it to decorate the mantle of the fireplace in the dining room.

Making a boxwood wreath is REALLY easy!  All you need is a base wreath, a paddle of medium green florist’s wire, Lots of boxwood, and some design items to add.  Look around your yard and see what kind of materials you can make into a beautiful wreath.  It really is a lot of fun.

Knitting (and crocheting)…Hats

Boo at the Zoo 001

This is the hat I made while in Chincoteague last week.

I made it for Allyson, because she always is looking for a new hat.

And it is pink and grey- two of her favorite colors.

I made it big and out of wool so it can be felted and shaped.

I really don’t know to crochet, except for the basic chain stitch.  I made up the

flower as I went along.  And I did the flower at home because I found out

something about Chincoteague I hadn’t been aware of before.

No one sells crochet(or knitting or large eyed sewing needles) hooks on the island.  NO ONE.  We asked at the pharmacy/drug store- where they sell everything from nose pads for your glasses to scented candles and hair dryers- but no crochet hooks.

We tried the Dollar stores, the grocery store, any number of specialty stores.

We found some acrylic yarn at one shop but NO crochet hooks.

So the hat couldn’t be f inished until we came home.

Boo at the Zoo 003

I like the way the rose/flower turned out even if it isn’t done right.

Boo at the Zoo 004

It’s amazing what you can do with a hook and yarn.