Bread! and pans and bacon jam! and chili!

 IMG_3205

This is the bread pan I got for Christmas.  It is spring lock and makes

bread that looks like this-


IMG_3219IMG_3220

IMG_3216

This is free form with sesame seeds.

IMG_3227

Rye with caraway seeds ( and the pot holder Willow made me).

IMG_3213

This is the bacon jam my niece made for Christmas gifts.

Great in peanut butter sandwiches!  🙂

And Chili!

I made a big pot for supper.

IMG_3222 IMG_3223 IMG_3225

I started with a 2 1/2 lb beef roast-slightly frozen- cut it into chunks and processed

it until it was medium fine, browned it with a chopped onion.

IMG_3226 and then added 3 TBS chili powder

1 tsp cumin

1 tsp oregano

1 scant tsp sea salt

1 tsp red pepper

1 small can diced tomatoes

Add above to browned meat and simmer for about 30 minutes.  Tomatoes will start

to break down.  Stir often to keep from scorching.

Add below ingredients- tomato products first, stirring well.  Add about 2 1/2 cups water

after paste.  Cook for another 30 minutes, then add beans.

1 can tomato sauce

1 small can tomato paste

1 can light red kidney beans

1 can dark red kidney beans

Cook another 3o to 45 minutes, stirring often and then taste.  Add extra ( hot sauce) heat at this point.

IMG_3235

Add salad and bread and enjoy!

IMG_3237

Baking day

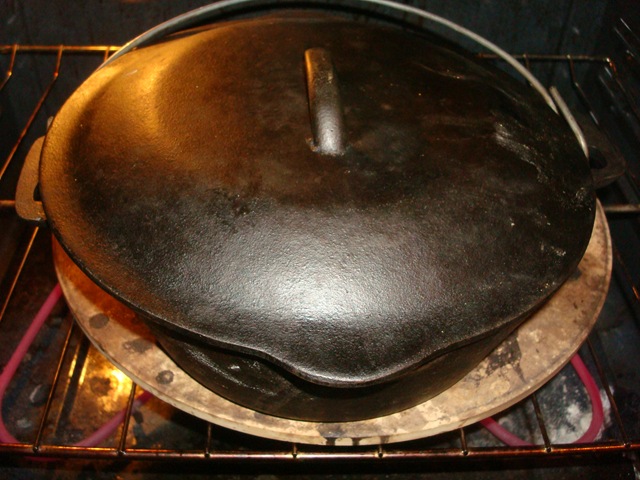
When it snows like this- ALL I really want to do is make soup and bread.

Today was one of those days when I wandered around a bit- doing this and that.  I’d start on one thing and then walk away and start something else, only to abandon that and move on.  It ends up being kind of cyclical- I come back to the first task and do a little more until distracted and move on.

I know- not organized or effective.

Just me.

So- I started the bread at around 11 AM- cleaned out a closet- came back and kneaded the dough- oiled the bowl and covered it and then pulled out the gingerbread cookies I hadn’t decorated  yet.  I wandered upstairs, got dressed (gasp- it was about noon by then) and brought down a load of clothes to wash.  Sat the basket next to the basement door, melted some white chocolate in the microwave and rooted around in the freezer for the cake balls I had frozen last Friday.  I painted the gingerbread apple centers with white chocolate and finished decorating another dozen or so cookies.  Then I added more discs to my bowl and melted some more white chocolate.  While the microwave was doing the actual heating- I punched down my dough, and then ran the dirty clothes downstairs and started a wash. (Plus I washed my hair.)

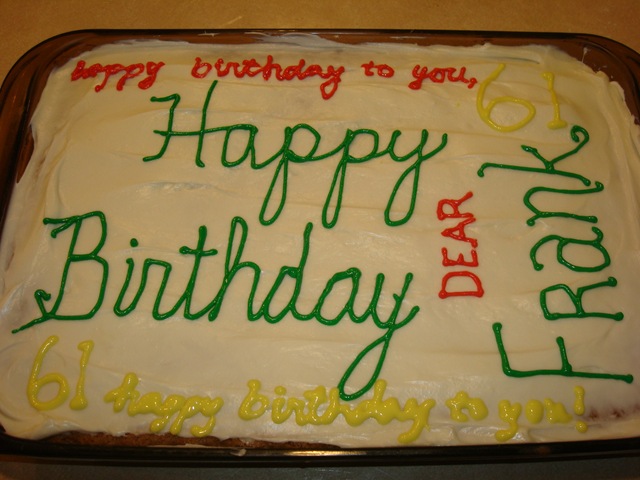
Now about 1:30- I decided to have some lunch- I made a grilled peanut butter and bacon sandwich and an apple- then started dipping the cake pops into the melted white chocolate and decorated the tops with red jimmies and a cinnamon imperial. ( the cake pops were made from Frank’s b-day cake- carrot with cream cheese frosting)

DSC01349 This cake- so the white chocolate and cinnamon of the little red hots will be perfect!

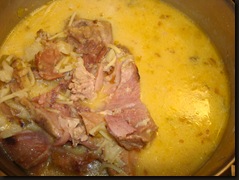
When I finished those, I packaged them back up for the freezer and started the soup.  Cauliflower soup with ham and cheese.

DSC01410list of ingredients:

1 1/2 cups chopped onion

1 1/2 cups chopped ham

3/4 cup chopped carrots

I TBS. olive oil

I head cauliflower

5 cups chicken stock ( or 4 cans broth)

Ragu double cheddar cheese sauce-

(or make a white sauce and melt 1 cup shredded

strong cheddar cheese into it.)

1/2 bag of fine noodles

Method:

Sautee first four ingredients until lightly browned, about 10-15 minutes on med-low heat.

Separate flowerettes of Cauliflower – you will end up with about 6 cups of small pieces.

(Separate by hand- DON’T chop-cutting tender vegetables with a knife seals the edges and

keeps the flavors from intermingling.)
Add cauliflower to sauteed base and pour 5 cups of chicken broth into pan

and allow to simmer about 45 minutes until tender.

When cauliflower is fork-tender, either make a white sauce and melt cheddar cheese into it or

add jar of double cheddar sauce.

In a medium pan, boil fine noodles for 1/2 of cooking time- then add to pot of soup.

I use these cooking cylinders I found at the thrift store- they work with boiling water

and never overcook pasta.

Add to soup pot and continue to simmer for about 15 to 20 minutes until all the ingredients meet and

marry in the pot!

Hah!  It is about 4:00 and I’ve baked nothing as yet.

BUT- I still have that dough I made much earlier raising quietly.  I really punched it down and it is slowly raising – so now- soup simmering-

I grab  the bowl and make Knotty Italian Rolls.

DSC01415

These are my all -time favorite rolls to go with soup.

The recipe-

Ingredients-

5 to 6 cups of bred flour

5 TBS of EVOO- the higher quality the better the flavor. I use one that is greenish in color .

(Olive Oil)

2 1/2 cups warm water (Not too Hot- but warm enough to give baby a bath!)

2 TBS yeast

1 TBS salt

3-4 TBS sesame seeds

egg white (for wash- to keep the seeds attached and to give rolls a shine!)

Method:

Mix together water and yeast and proof. ( You can add a half teaspoon of sugar to feed the yeast and it will proof faster. Proofing means to add water to the yeast and set aside for several minutes to allow the yeast to grow. If it doesn’t start foaming within this time- then discard and try again- your water was either too hot and killed the yeast or too cold and never started it going- or your yeast is VERY old- check the expiration date!)

In a large bowl, mix together the salt and flour and make a well in the center of your flour. Pour yeast water into the well, add olive oil and mix well with large spoon. If it is too wet, add some flour. If it is too dry, add some warm water. It should come together in a lump or ball- roll the dough around the inside of your bowl to clean off the sides a bit, flour the counter and dump the lump onto the counter top.

Clean as much as you can from the bowl, then flour your hands and start kneading. Knead for about 10 minutes- your heart should be pounding slightly and your arms should be tired- and the dough should be feeling smooth and elastic. Put about 1TBS of EVOO in your bowl- You don’t have to wash it- but you should have done a better job of cleaning out the dough- and roll the dough around the inside to cover with oil. Cover with plastic wrap and tea towel and allow to raise 1 1/2 hours- then punch it down and let it raise another hour or so. This makes the yeast work and the gluten strands are formed with the second raising.

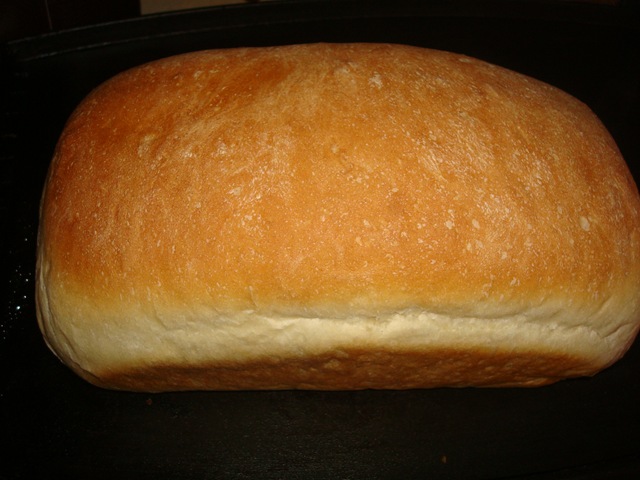
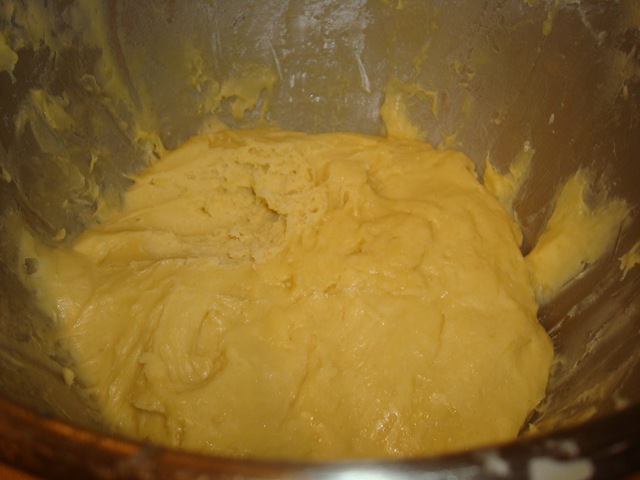
When it has raised the second time and leaves a small indentation when you poke it, you can start shaping your rolls.

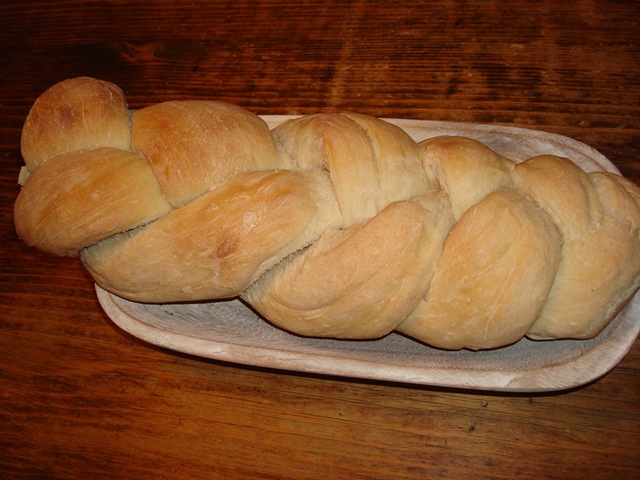
It should look like this .

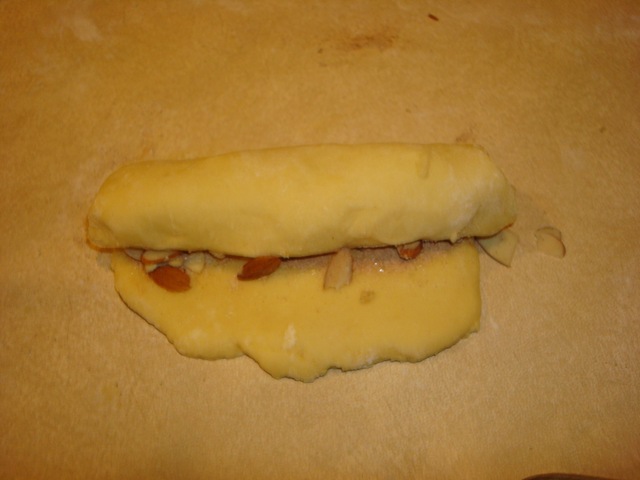
Take a small handful and start rolling it into a long snakey shape with your hands. It needs to be about 12 inches long.

Because you are going to fold it in half. Don’t put it back on the counter- I was my own photographer for this session and had to put it down to take the picture- but you want to keep it in your hands. Because the next step… involves twisting the strip and pulling it through the hole at the top (it helps if you are ambidextrous- but this is not necessary)-

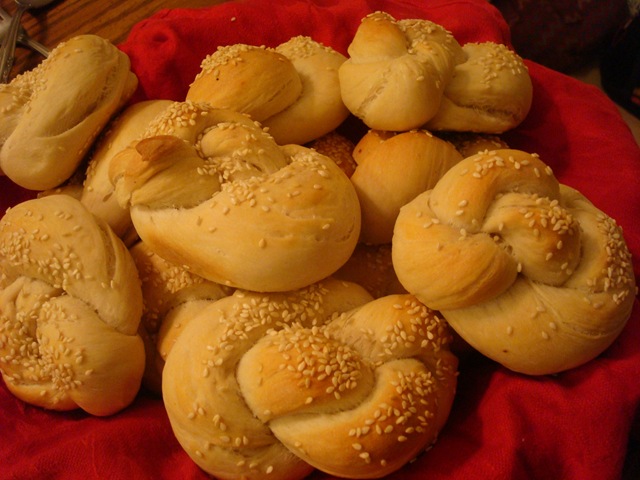
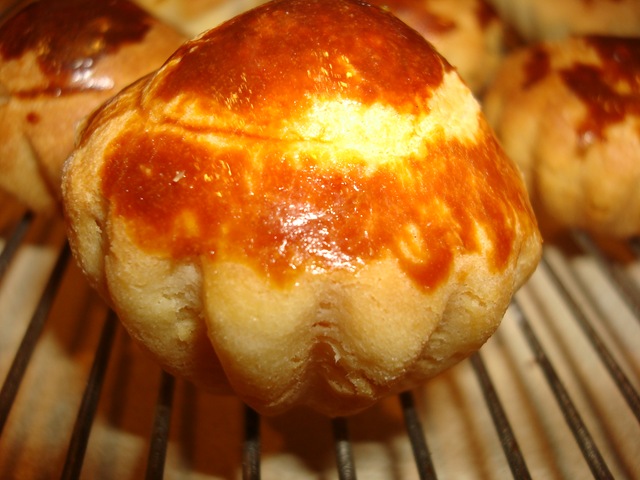
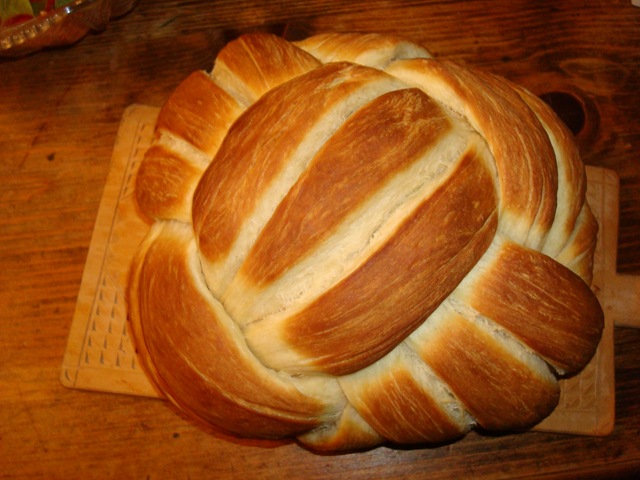
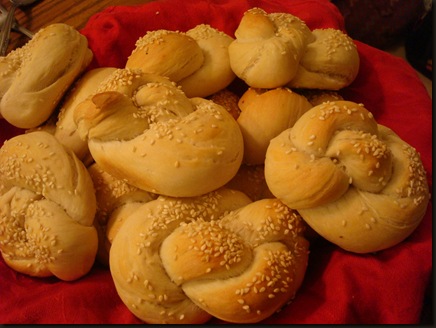
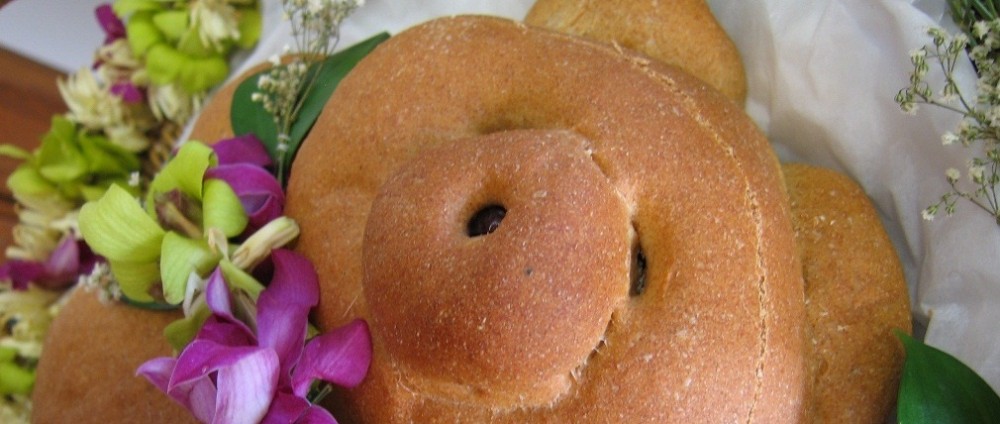
pull it through TWICE and then secure the bottom of the twist to the top by pinching it. It should end up looking like this- a knotty roll!

( To answer the perennial question of “But why is it so naughty? ” Anyone who actually makes these rolls already knows the answer- it is difficult to make them take their intended shape. Practice, practice ,practice.)

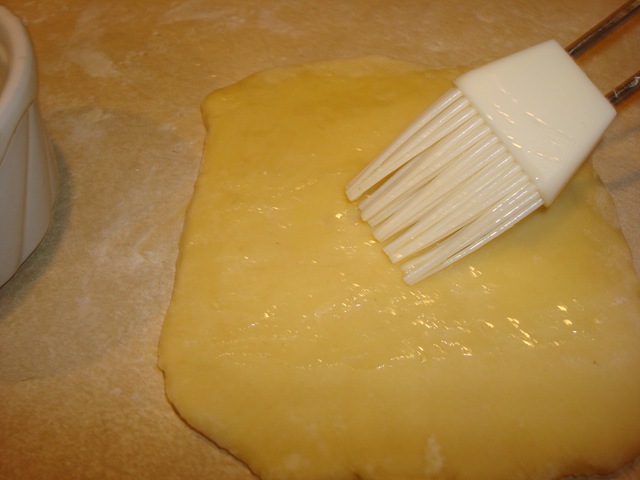
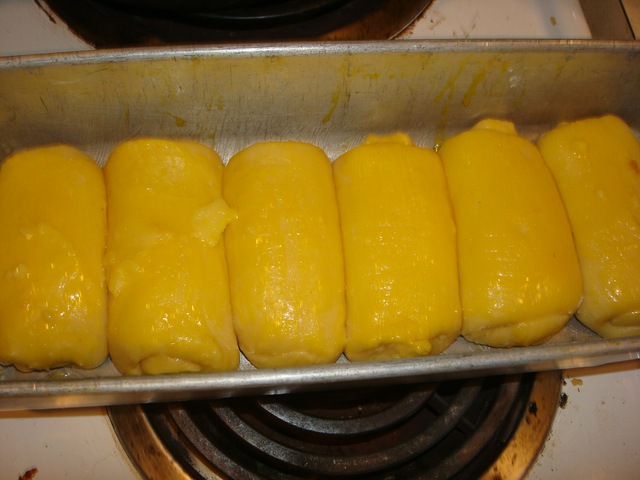
If you can’t get them into this shape Then just twist them, put on a little egg wash, shake some sesame seeds on top of that and allow them to raise another 30 minutes and them bake in a 375 degree F oven for about 20 minutes or until a light golden brown.

So , you can decide if you want rolls or twists- either way- they are delicious! Enjoy!!


OK- those were made, set to raise and baked by 7:00 for dinner.  So I did end up baking.  It was just a convoluted day- a lot like this post.

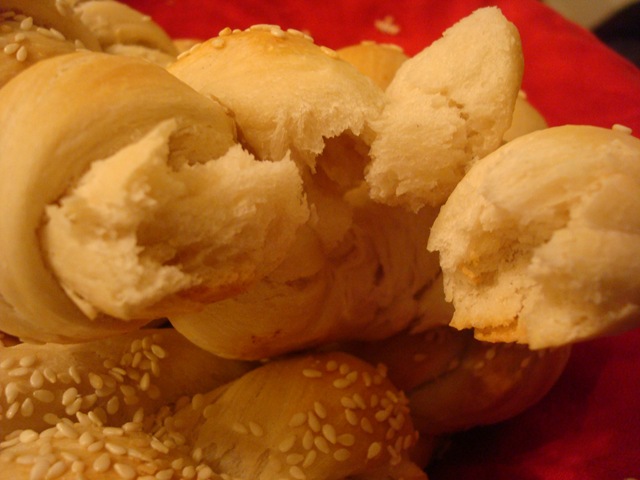
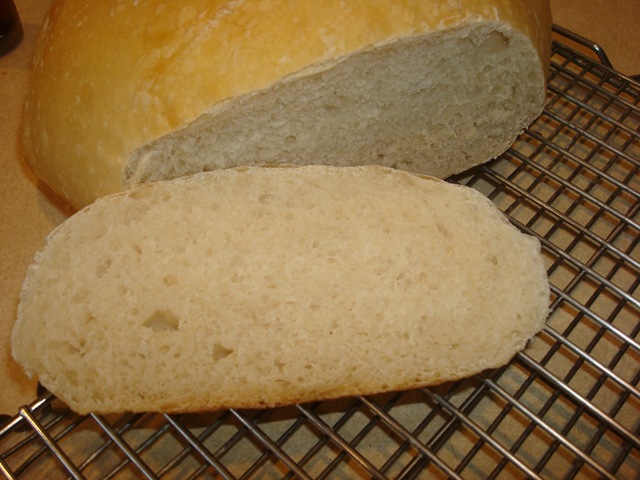
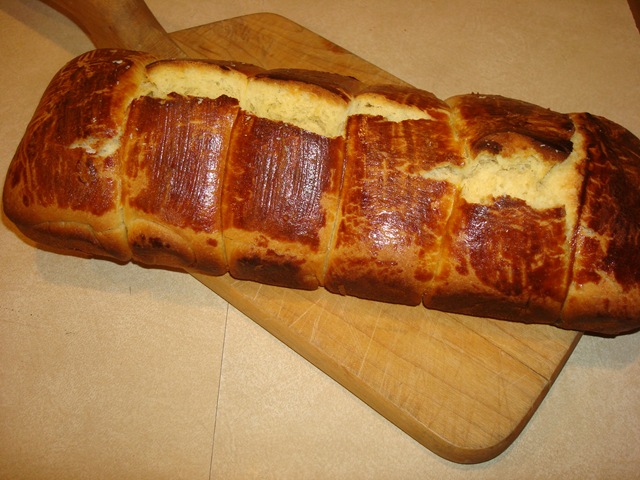
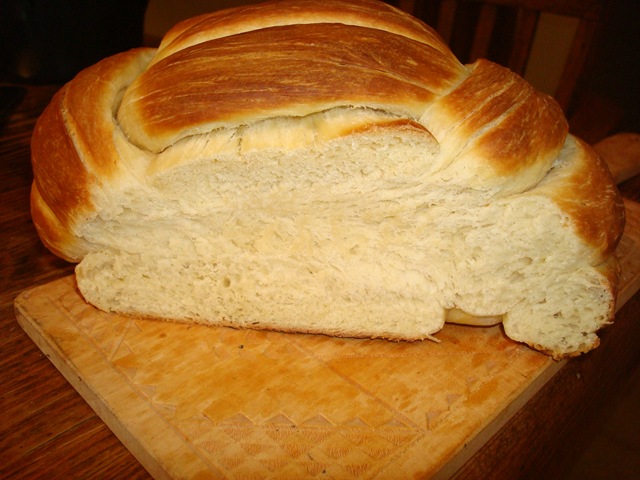
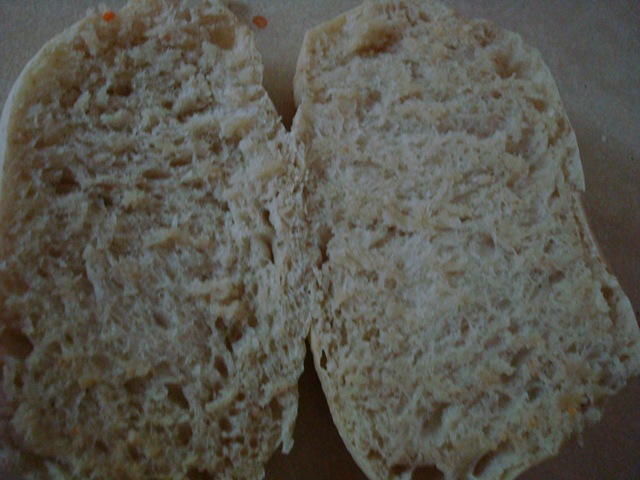
Here’s one final picture of the rolls- I’m not calling it a crumb shot because these have a texture that is stretchy and chewy and crunchy- just like the very best Italian bread.

DSC01416

Making Bread-

… no Yoga exercise, no hour of meditation … will leave you emptier of bad thoughts than this homely ceremony of making bread.

–M.F.K. Fisher, The Art of Eating

This is so very true.

And for the past two days my thoughts have been pure.

PURE BREAD!

I made a lovely couple of loaves of toasting bread.  I love this bread.

It cannot be burnt in a normal toaster- and my husband is notorious for burning the toast.  So for his birthday I made him some bread he can’t burn!

DSC01348

As a special surprise, I sliced it, too!

Then I made him a carrot cake for his Birthday.

DSC01349

It was quite lovely, as well.

And then- I made some sourdough bread- it doesn’t burn in the toaster either- and it has a greater appeal for my taste buds.

DSC01364

I tried a method of baking I’ve been hearing a lot about and decided to give it a try.  Actually, Joanna,over at ZEB BAKES, made some the other day and inspired me to try.

It is baked in a VERY hot pot inside a VERY hot oven.

DSC01366 This pot- an old cast iron pot I got at a garage sale many years ago.  I’ve used it to cook chili in the fireplace when the electricity was out- I’ve made coney sauce in it over the grill- and now it has baked my bread!  DSC01351

( I lined it with parchment paper)

DSC01352 – because the bread raised in a bowl in the garage all night and I didn’t want to disturb it- so I lifted it with the paper and gently dropped it into the VERY hot pot and baked it up.

DSC01365 DSC01367

The bottom crust and the crumb shot.  I think I needed to degas it and let it raise again- but I really wanted it for my toast this morning.

Joanna also made some brioche and shared the recipe.

So I made it too.

I had made brioche years ago and then never made it again.

Now I remember why.

DSC01353

Brioche is a very buttery and eggy bread.

The dough is very sticky.

And to make it right- you have to give it a lot of time to develop.


DSC01356 DSC01358 DSC01360 

And then there is the shaping.

DSC01369

It turned out – not great- but acceptable-

DSC01371 DSC01374

-except I remembered why I never made it again.

I don’t like egg-y bread.

DSC01375  I bought this book back in 1996.  And I made her breads- sourdough and artisan breads- great recipes- In fact- my sourdough baking started that year because of her delicious breads.

But she has them labeled by time allotments- and the brioche was a 3 day bread.

First a white starter, then a long time in the cooler- then a cold mix with the mixer going for about 20-30 minutes.  Then another long time in the cooler.

Then shaping- a VERY long raise and baked at 500 degrees F- and I didn’t enjoy the egg taste. 

But – I made it- gave it another try- and won’t be making it again.

Thanks Joanna for the challenge-

I’ll be taking this with some jelly to knitting class, tomorrow.

Maybe they like brioche!


Nancy Silverton’s Breads from the La Brea Bakery, (1996) is still available from Amazon Books.

Baking bread- for stuffing-plus the recipe for bread stuffing.

bread for stuffing 001

My favorite part of the Thanksgiving meal is the stuffing.

I love making it, snacking on it, tasting it, breakfasting  on it on Thursday morning, and eating it with gravy poured over it for dinner.

I have made it for about 30 years- with help from first Robin and my mom and now Cynthia, and I won’t give up making  it until I absolutely have to.  This year, I’ve been making my own bread to go into our stuffing.  I’ve used whole wheat bread left over before- but never baked loaves specifically to use for the stuffing.

Until now.

Store bought bread is expensive – and it really isn’t that good.  I don’t like to eat it for sandwiches, so why should I put it into my favorite dish?

I’ve baked 5 loaves of bread- two a light  sourdough bread, one a rye, and the last two peasant bread.  I’ve sliced and cubed 3 loaves and toasted them in the oven-


bread for stuffing 003 bread for stuffing 002

and I am so looking forward to putting them into the stuffing on Wednesday!


Here’s my stuffing recipe- although it is approximate because I change it according to what I have in stock.

1 lb butter,melted

3 cups chopped celery

3 cups chopped onion

2-3 cups chopped parsley

1 lb bulk sausage, mild

1 cup chopped walnuts

6 to 8 cups bread, cut into crouton sized squares

2 cups turkey or chicken broth

salt and pepper, to taste

poultry seasoning- about 1 tsp or to taste

Sautee the celery and onion in the butter until it is transparent and soft.  Add to big bowl full of cut up bread cubes.  Sautee the sausage and add to bowl along with the parsley and nuts.  Stir until well mixed and taste.  Add salt and pepper and poultry seasoning, pour 1 cup of broth on top and stir again until the bread is moist and everything is mixed up well.  Now taste again (this is the best part of this recipe!).

If it seems a little dry- add more broth, adjust your seasonings, and taste, yet again!

This makes a lot of dressing, but I make it the day before and let it sit in the fridge overnight so that all the flavors can marry, then I have a bowl for breakfast on Thanksgiving morning.  You can stuff it into the turkey or put it into a casserole or even in a slow cooker- but if you use the last two options, add another cup of broth so it doesn’t dry out.

Stuffing is the best part of Thanksgiving dinner!chef

It’s not just in the making- SHAPING counts when it comes to dinner rolls-recipe included


Several years ago I put up a tutorial on a previous blog on how to make dinner rolls shaped like turkeys.  Actually- to my eye they look more like mourning doves, but everyone who gets one is delighted- so I’m repeating the tutorial today.  I usually make 5 or 6 dozen of these for The Bake Shop just before our American Thanksgiving- so I’ll be making these this week. 

Turkey Dinner Rolls are easy to portion- easy to shape!
Roll out half of dough on pastry board into large circle. Cut circle in quarters, then cut each quarter into 5ths – so you have 20 long triangle pieces of dough.

And now you shape them!
If you just want a crescent roll, roll them up from the largest end and place them with the point on the bottom- raise and bake at 375 degrees F for about 12 to 15 min.

But if you are wanting to make rolls that look like turkeys-
( they don’t taste like turkey!)

But they LOOK like turkeys-
I put a dozen on a baking sheet. And they raise and get all bristly looking in the oven!

Then you need to shape them, using a bamboo shishkabob stick.
Then you need to shape them, using a bamboo shish kabob stick.
Starting at the small pointy end of the dough triangle you roll up the dough about half way up and form it into a ball.

Save back a small piece to make the turkeys head.

After you roll it into a ball (only halfway)
Then pinch the back of the ball together and press the circumference of the ball into the flat part of the triangle that you have left.

So- at this point you have a small ball attached to a flat piece of dough

Using your fingers press firmly on the edges of the ball.
It will start to look like a big belly of a turkey against the flat back tail piece.

Now - using your bamboo stick -
Now – using your bamboo stick –
catch a small portion of the belly piece and make tail feathers by pressing the stick into scored lines around the belly. Don’t press so hard that you cut all the way through the dough- but you want to leave deeply scored lines to delineate the tail feathers.

Now attach the reserved all of dough b poking all around it .
Now attach the reserved ball of dough poking all around it .
Place the small ball on the top of the belly and poke around the edges to attach.
Allow to raise about 15 minutes and then bake until golden brown!(375 degrees)

They come out all cute and puffy!

And there you have them-  turkey dinner rolls.
And there you have them- turkey dinner rolls.
For Thanksgiving!

Roll recipe- makes about 3 dozen rolls.
Ingredients;
6 cups all purpose flour
1 1/2 cups milk ,scalded in microwave (about  2 min on high)
1 stick butter or margarine
2 eggs
1/2  cup sugar
1 Tbs salt
2 Tbs yeast
1 cup warm water
scant tsp sugar
Method:
Put flour, sugar and salt into large bowl and whisk together- form well in center of flour.  Melt butter or margarine in the hot milk and set aside.  Proof yeast (mix  together yeast and sugar, stir in water and watch for growth reaction- it should start growing  almost immediately).  Beat eggs and pour into well, add milk mixture (butter should be completely melted) and stir until the flour and liquid are one mass.  Add proofed yeast-(  if the yeast didn’t raise ,proof another batch, either it is too old or your water was too hot) and mix the whole mess into a sticky dough!  Flour counter, dump dough onto flour , add some more on your hands and knead for at least 10 minutes.  This is a Big ball of dough so put your muscles into it.  Grease large bowl, form dough into a ball and allow to raise, covered, for at least an hour , until doubled in volume.  Cut ball in half and roll into large circle.  Form your rolls and enjoy! 
Don’t forget to be thankful – I usually pray while making these- it makes the whole experience Totally worthwhile!

A Basket of Bread bears…(subtitled Lord of the bears)

Halloween bread bears 008 

In my family, we sing the children to sleep.  There is a bathtime ritual, a couple of books read, prayers said, and then- songtime.

It can last a long time.  But it is comforting and quieting and bonding time and well worth spending.  My oldest son, Luke, has been singing my grandson to sleep with simple little tunes – and recently he heard Aidan singing one of them to his stuffed bear as they danced in a circle, bear swinging wildly-

“I am the Lord of the bear, bear, bear!”( to the tune of “Lord of the Dance”)

Today I am the Lord of the bread bears!

I made whole wheat bears, I made Italian bears, and I made spelt flour and oat bran sourdough bears!  And they all kept their shapes and minded their manners whilst in the oven- coming out pretty much still in the same shape they entered.

Here is a whole grouping of photos- bears in and out of disguise- all to please your fancy on this Monday before Halloween!

Halloween bread bears 003 -bears in the basket awaiting costuming.

Halloween bread bears 004 -whole wheat bears, masked and ready.

Halloween bread bears 005

BOO!

Halloween bread bears 007 -bears with little brothers!

Halloween bread bears 011 Italian Bear and spelt and oat bran sourdough bear-  bears in pairs!

Halloween bread bears 012 -bears getting dressed!

Halloween bread bears 013

– bears bagged and ready to go!

They looked so cute, I couldn’t keep the pictures all to myself.

Take a look at this!

Winston Knot 013

Winston Knot braided bread!  I got the recipe and instructions here on Celia’s blog.  It was relatively easy and absolutely delicious!   Light and buttery – Frank LOVED it- and so do I.

Thanks, Celia. 

If anyone else would like to try it- go to fig jam and lime cordial  and follow Celia’s tutorial.  You won’t be sorry- I promise!

Take another look-

Winston Knot 014

Now check out the crumb-

Winston Knot 018

Try it- you’ll like it!

Green Chicken Pizza?

salty nutty bars 004

Not green eggs and ham.

Would you eat green salsa and chicken pizza?

You should give it a try –  it’s really yummy!

green pizza

I started off making a salsa verde, the recipe is here. And then I made a pizza dough- you can use your favorite recipe or… use this one.

Ingredients:
5 cups bread flour
2 tsp sea salt( or less- I like the salty yeasty,EVOO flavor)
1 1/2 cups warm water (105 F)
1 1/2 TBS yeast
1/4 cup good quality olive oil
Method:
Proof yeast in half cup of water- you can add 1/2 tsp sugar to expedite this step.
In large bowl stir salt and 4 1/2 cups flour together and make a small well at the bottom of the bowl. Add warm water, olive oil and stir the flour just enough to moisten it, then add the foamy yeast and mix thoroughly with a wooden spoon . You may need to add a little more liquid at this point- the dough should be soft and slightly sticky.
Dust surface of counter with remaining flour and dump dough out. Knead for at least 10 minutes until dough is smooth and pliable. You may need to add a handful of flour – but not enough to dry out dough. Smooth , pliable,and slightly sticky is the description of what you want at this point. Then form a ball and place in bowl that has been oiled, cover with plastic and let raise at least an hour til double in size. Now! Punch the dough down, knead gently for at least 5 minutes and let raise a second time until doubled again (around 45 minutes) this second raise is what gives the dough that stretchy, yeasty, Italian flavor. Don’t skip it!
At the end of second raising, shape into desired bread or roll out (or toss) for pizza. Allow to raise about 1/2 hour and bake at 350F until golden brown.

Next grill a large chicken breast.  I rubbed it with cumin and garlic and lemon pepper and then drizzled some olive oil on top and grilled it about 5 minutes each side.  Then tear into pieces if you are feeling a little aggressive, or just chop it into small pieces.  Smear the salsa verde over the pizza crust, sprinkle the chicken on top and add your favorite cheese.  I used mozzarella, romano, and Parmesan.  Drop some pepper rings or olives- or whatever you prefer on your pizza and bake at 375 degrees F for about 20 minutes or until golden brown.

This is really good pizza- and a nice break from red sauce.

What preparation ? Bread and Babies!

I said I was preparing to go away for a week.

I never said I was packing.

Or getting clothes laundered or buying supplies, did I?

Good.

Because my preparations look more like this:

baby bath 002

baby bath 005

And this:

sourdough rye and stars 001 sourdough rye and stars 002  sourdough rye and stars 003

And these lovely loaves:

sourdough rye and stars 006sourdough rye and stars 009

Not a thing packed- I’ll do laundry tomorrow.

Today I made marvelous bread and helped give a baby his first bath.

Bread and babies-

a perfect preparation for a happy time.

Sourdough Braid-for Celia

bread nd yarn 001 

I added far less flour to this loaf, so it was a little sticky to work with.

I sprinkled semolina flour on my work surface after I had the strands rolled out and it coated the bottoms of each portion as I braided. 

Good luck – and try using more flour as you work the dough.