Baking day

When it snows like this- ALL I really want to do is make soup and bread.

Today was one of those days when I wandered around a bit- doing this and that.  I’d start on one thing and then walk away and start something else, only to abandon that and move on.  It ends up being kind of cyclical- I come back to the first task and do a little more until distracted and move on.

I know- not organized or effective.

Just me.

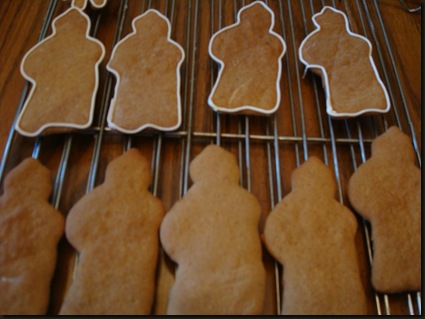
So- I started the bread at around 11 AM- cleaned out a closet- came back and kneaded the dough- oiled the bowl and covered it and then pulled out the gingerbread cookies I hadn’t decorated  yet.  I wandered upstairs, got dressed (gasp- it was about noon by then) and brought down a load of clothes to wash.  Sat the basket next to the basement door, melted some white chocolate in the microwave and rooted around in the freezer for the cake balls I had frozen last Friday.  I painted the gingerbread apple centers with white chocolate and finished decorating another dozen or so cookies.  Then I added more discs to my bowl and melted some more white chocolate.  While the microwave was doing the actual heating- I punched down my dough, and then ran the dirty clothes downstairs and started a wash. (Plus I washed my hair.)

Now about 1:30- I decided to have some lunch- I made a grilled peanut butter and bacon sandwich and an apple- then started dipping the cake pops into the melted white chocolate and decorated the tops with red jimmies and a cinnamon imperial. ( the cake pops were made from Frank’s b-day cake- carrot with cream cheese frosting)

DSC01349 This cake- so the white chocolate and cinnamon of the little red hots will be perfect!

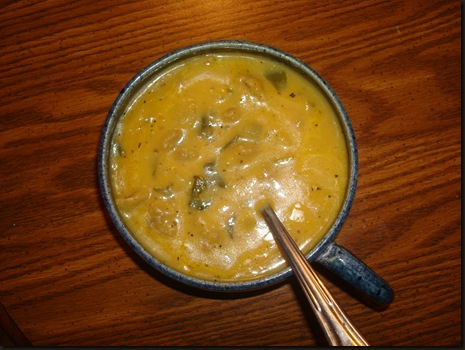
When I finished those, I packaged them back up for the freezer and started the soup.  Cauliflower soup with ham and cheese.

DSC01410list of ingredients:

1 1/2 cups chopped onion

1 1/2 cups chopped ham

3/4 cup chopped carrots

I TBS. olive oil

I head cauliflower

5 cups chicken stock ( or 4 cans broth)

Ragu double cheddar cheese sauce-

(or make a white sauce and melt 1 cup shredded

strong cheddar cheese into it.)

1/2 bag of fine noodles

Method:

Sautee first four ingredients until lightly browned, about 10-15 minutes on med-low heat.

Separate flowerettes of Cauliflower – you will end up with about 6 cups of small pieces.

(Separate by hand- DON’T chop-cutting tender vegetables with a knife seals the edges and

keeps the flavors from intermingling.)
Add cauliflower to sauteed base and pour 5 cups of chicken broth into pan

and allow to simmer about 45 minutes until tender.

When cauliflower is fork-tender, either make a white sauce and melt cheddar cheese into it or

add jar of double cheddar sauce.

In a medium pan, boil fine noodles for 1/2 of cooking time- then add to pot of soup.

I use these cooking cylinders I found at the thrift store- they work with boiling water

and never overcook pasta.

Add to soup pot and continue to simmer for about 15 to 20 minutes until all the ingredients meet and

marry in the pot!

Hah!  It is about 4:00 and I’ve baked nothing as yet.

BUT- I still have that dough I made much earlier raising quietly.  I really punched it down and it is slowly raising – so now- soup simmering-

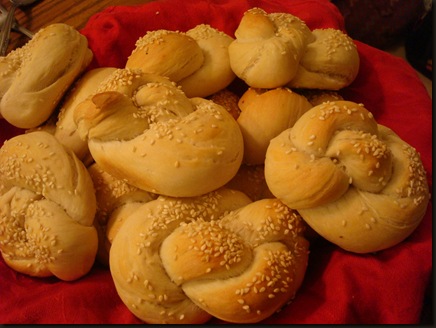
I grab  the bowl and make Knotty Italian Rolls.

DSC01415

These are my all -time favorite rolls to go with soup.

The recipe-

Ingredients-

5 to 6 cups of bred flour

5 TBS of EVOO- the higher quality the better the flavor. I use one that is greenish in color .

(Olive Oil)

2 1/2 cups warm water (Not too Hot- but warm enough to give baby a bath!)

2 TBS yeast

1 TBS salt

3-4 TBS sesame seeds

egg white (for wash- to keep the seeds attached and to give rolls a shine!)

Method:

Mix together water and yeast and proof. ( You can add a half teaspoon of sugar to feed the yeast and it will proof faster. Proofing means to add water to the yeast and set aside for several minutes to allow the yeast to grow. If it doesn’t start foaming within this time- then discard and try again- your water was either too hot and killed the yeast or too cold and never started it going- or your yeast is VERY old- check the expiration date!)

In a large bowl, mix together the salt and flour and make a well in the center of your flour. Pour yeast water into the well, add olive oil and mix well with large spoon. If it is too wet, add some flour. If it is too dry, add some warm water. It should come together in a lump or ball- roll the dough around the inside of your bowl to clean off the sides a bit, flour the counter and dump the lump onto the counter top.

Clean as much as you can from the bowl, then flour your hands and start kneading. Knead for about 10 minutes- your heart should be pounding slightly and your arms should be tired- and the dough should be feeling smooth and elastic. Put about 1TBS of EVOO in your bowl- You don’t have to wash it- but you should have done a better job of cleaning out the dough- and roll the dough around the inside to cover with oil. Cover with plastic wrap and tea towel and allow to raise 1 1/2 hours- then punch it down and let it raise another hour or so. This makes the yeast work and the gluten strands are formed with the second raising.

When it has raised the second time and leaves a small indentation when you poke it, you can start shaping your rolls.

It should look like this .

Take a small handful and start rolling it into a long snakey shape with your hands. It needs to be about 12 inches long.

Because you are going to fold it in half. Don’t put it back on the counter- I was my own photographer for this session and had to put it down to take the picture- but you want to keep it in your hands. Because the next step… involves twisting the strip and pulling it through the hole at the top (it helps if you are ambidextrous- but this is not necessary)-

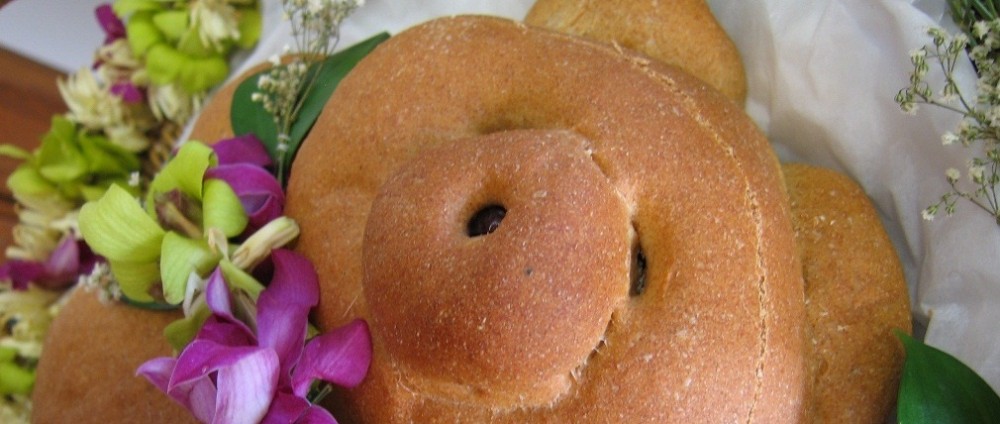
pull it through TWICE and then secure the bottom of the twist to the top by pinching it. It should end up looking like this- a knotty roll!

( To answer the perennial question of “But why is it so naughty? ” Anyone who actually makes these rolls already knows the answer- it is difficult to make them take their intended shape. Practice, practice ,practice.)

If you can’t get them into this shape Then just twist them, put on a little egg wash, shake some sesame seeds on top of that and allow them to raise another 30 minutes and them bake in a 375 degree F oven for about 20 minutes or until a light golden brown.

So , you can decide if you want rolls or twists- either way- they are delicious! Enjoy!!


OK- those were made, set to raise and baked by 7:00 for dinner.  So I did end up baking.  It was just a convoluted day- a lot like this post.

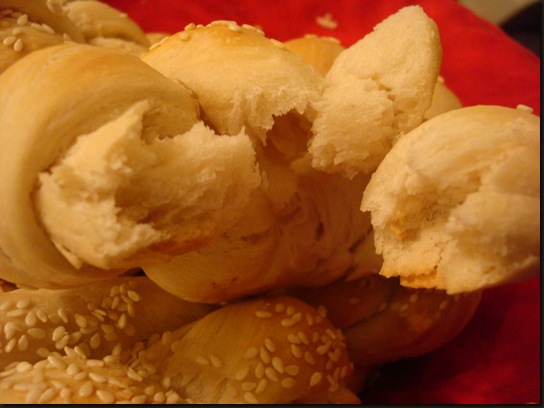
Here’s one final picture of the rolls- I’m not calling it a crumb shot because these have a texture that is stretchy and chewy and crunchy- just like the very best Italian bread.
DSC01416

Making plans…and soup!(recipe included)

image

                                                 Assateague Island Beach

                                                      November 2010

This is where I long to be!

And will be soon- Meredith is coming home in mid-December and we are headed down to Chincoteague.  Look at the waves!  I can hardly wait to stand on the beach and look at the beauty and majesty of the Atlantic!

DSC01340

And now on to the soup-

Curried Squash and sausage soup with spinach.

I made this just after Thanksgiving.  I wanted a totally different taste from the whole turkey and stuffing menu- and I had leftover squash, pumpkin and sausage from the pies and stuffing.

This was perfect for the cool temperatures and made a great black Friday lunch.

It was also great on Saturday when Jordan and I finished it off.

Ingredients:

1 medium squash -baked and cleaned

1/2 lb bulk sausage- I used Italian, sautee and chop fine

1 small onion-diced

2 ribs celery-diced

1 TBS olive oil

2 TBS curry powder

4 cups chicken brothe

1/2 lb baby spinach

S+P to taste

I added the leftover pumpkin(canned, about 3/4 cup) to the squash and blended it with an immersion blender.

Method:

Sautee the onions and celery in the olive oil until tender,  add the cooked sausage, and the squash mix and stir in the curry powder.  Salt and pepper to taste, then add the chicken broth and heat.  Simmer for about 10-15 minutes, then add the spinach and stir until they wilt into the soup.  Taste – I added a little coconut milk ( or cream or half and half) at this point, because it was just a little harsh and I was looking for mellow.  I also added a little (1/2 tsp) of dried basil- it was that kind of day- adding until it tasted just right.

Finding St. Nicholas and a spice cookie recipe

DSC04807

DSC04808

image image

I was a little reluctant to start these cookies.  My expectations were too high.

I was hoping to make in gingerbread and icing that which I could hardly sketch with pencils.

But they turned out quite nice, in my opinion.

DSC04801

They started out rather amorphous shapes.

Then I outlined them with royal icing.

(basically egg whites, cream of tartar and 10x sugar)

DSC04802 DSC04803

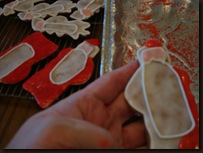
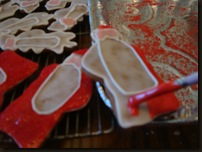
Then after painting them with a white glaze, I started defining the design.    Because I wanted them a deep red, the icing needed a lot of red food coloring, and even then it wasn’t dark or rich enough, so I added a sprinkling of red sanding sugar.  This added the depth of color and a wonderful texture.

DSC04805 ,

The smaller St. Nick had a small ball spatter that gave it a more rustic look.

DSC04809

I had a lot of red icing left- so I made some apples as well and added gourmet red sugar to the look-

DSC04810 it sure added to the sparkle!

Here’s the recipe for the cookies- I tried to convert it for you metric users.

(If I were you, I’d double check my measurements- I’m not a whiz at math!)

Spice Cookies

Ingredients:

1 cup (227 grams) shortening

3/4 cup (652 grams) brown sugar

3/4 TBS cinnamon

3/4 tsp of ginger, cloves, nutmeg

2 large eggs

1 cup (342 grams) molasses

3/4 tsp baking powder

1 1/4 tsp baking soda

4 1/2 cup (482 grams) AP flour

Method:

Cream together shortening, sugar,spices- add eggs, beating in until smooth.  Add molasses, again beating until smooth.  Stir in dry ingredients, mix until you have a sticky mess!  Well, maybe not a mess, but the dough is quite sticky! 

You will be adding flour when you roll them out – but for right now stick into the refrigerator, and leave overnight.

Roll out and cut into shapes- or make into balls and roll in sugar and bake at 375 degrees F (180 degrees C) for 8-10 minutes

.DSC04811

And decorate to your heart’s delight!

Now I’m off to make the stuffing!

Pumpkin Pie- American Style

image

 image

Here’s my pie.

I put an acorn crust around the edge.

image

I painted the edge with egg white and cut the acorns out of pie dough with a tiny linzer cookie cutter.

image

Sorry- I’m not a good photographer.

But this pie is so good!


image

I started with a pumpkin and baked it.  Then I cleaned it out and pureed it.  Then I put it into a fine colander I lined with cheese cloth and let most of the liquid drain off.

I mixed it with 3/4 cup sugar, 2 heaping tsps. of cinnamon, 1 1/2 tsp of ginger, 1/2 tsp nutmeg and 1/2 tsp cardamom ( Good idea, Brydie!)

Then I added two beaten eggs and 1 can of evaporated milk (NOT condensed. That would make it too sweet!)

I poured it into the crust, covered the edges with aluminum foil and baked it at 425 degrees F for 15 minutes – then turned the oven down to 350 F and baked for another 55 minutes, taking the foil off in the last ten minutes of baking.

Honestly- I don’t like most people’s pumpkin pies.  They are too sweet- or the spice is not right.  Sweet potato pies seem to have a lot more flavor and don’t need much sugar at all. 

But if I’m going to eat a pumpkin pie-

it’s going to be this one!


image

Baking bread- for stuffing-plus the recipe for bread stuffing.

bread for stuffing 001

My favorite part of the Thanksgiving meal is the stuffing.

I love making it, snacking on it, tasting it, breakfasting  on it on Thursday morning, and eating it with gravy poured over it for dinner.

I have made it for about 30 years- with help from first Robin and my mom and now Cynthia, and I won’t give up making  it until I absolutely have to.  This year, I’ve been making my own bread to go into our stuffing.  I’ve used whole wheat bread left over before- but never baked loaves specifically to use for the stuffing.

Until now.

Store bought bread is expensive – and it really isn’t that good.  I don’t like to eat it for sandwiches, so why should I put it into my favorite dish?

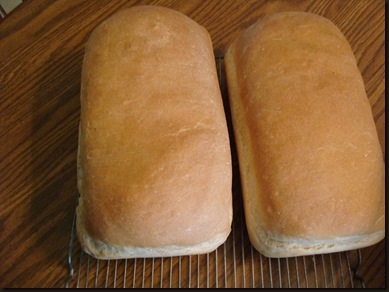
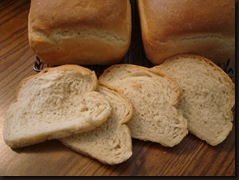
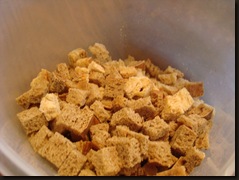
I’ve baked 5 loaves of bread- two a light  sourdough bread, one a rye, and the last two peasant bread.  I’ve sliced and cubed 3 loaves and toasted them in the oven-


bread for stuffing 003 bread for stuffing 002

and I am so looking forward to putting them into the stuffing on Wednesday!


Here’s my stuffing recipe- although it is approximate because I change it according to what I have in stock.

1 lb butter,melted

3 cups chopped celery

3 cups chopped onion

2-3 cups chopped parsley

1 lb bulk sausage, mild

1 cup chopped walnuts

6 to 8 cups bread, cut into crouton sized squares

2 cups turkey or chicken broth

salt and pepper, to taste

poultry seasoning- about 1 tsp or to taste

Sautee the celery and onion in the butter until it is transparent and soft.  Add to big bowl full of cut up bread cubes.  Sautee the sausage and add to bowl along with the parsley and nuts.  Stir until well mixed and taste.  Add salt and pepper and poultry seasoning, pour 1 cup of broth on top and stir again until the bread is moist and everything is mixed up well.  Now taste again (this is the best part of this recipe!).

If it seems a little dry- add more broth, adjust your seasonings, and taste, yet again!

This makes a lot of dressing, but I make it the day before and let it sit in the fridge overnight so that all the flavors can marry, then I have a bowl for breakfast on Thanksgiving morning.  You can stuff it into the turkey or put it into a casserole or even in a slow cooker- but if you use the last two options, add another cup of broth so it doesn’t dry out.

Stuffing is the best part of Thanksgiving dinner!chef

It’s not just in the making- SHAPING counts when it comes to dinner rolls-recipe included


Several years ago I put up a tutorial on a previous blog on how to make dinner rolls shaped like turkeys.  Actually- to my eye they look more like mourning doves, but everyone who gets one is delighted- so I’m repeating the tutorial today.  I usually make 5 or 6 dozen of these for The Bake Shop just before our American Thanksgiving- so I’ll be making these this week. 

Turkey Dinner Rolls are easy to portion- easy to shape!
Roll out half of dough on pastry board into large circle. Cut circle in quarters, then cut each quarter into 5ths – so you have 20 long triangle pieces of dough.

And now you shape them!
If you just want a crescent roll, roll them up from the largest end and place them with the point on the bottom- raise and bake at 375 degrees F for about 12 to 15 min.

But if you are wanting to make rolls that look like turkeys-
( they don’t taste like turkey!)

But they LOOK like turkeys-
I put a dozen on a baking sheet. And they raise and get all bristly looking in the oven!

Then you need to shape them, using a bamboo shishkabob stick.
Then you need to shape them, using a bamboo shish kabob stick.
Starting at the small pointy end of the dough triangle you roll up the dough about half way up and form it into a ball.

Save back a small piece to make the turkeys head.

After you roll it into a ball (only halfway)
Then pinch the back of the ball together and press the circumference of the ball into the flat part of the triangle that you have left.

So- at this point you have a small ball attached to a flat piece of dough

Using your fingers press firmly on the edges of the ball.
It will start to look like a big belly of a turkey against the flat back tail piece.

Now - using your bamboo stick -
Now – using your bamboo stick –
catch a small portion of the belly piece and make tail feathers by pressing the stick into scored lines around the belly. Don’t press so hard that you cut all the way through the dough- but you want to leave deeply scored lines to delineate the tail feathers.

Now attach the reserved all of dough b poking all around it .
Now attach the reserved ball of dough poking all around it .
Place the small ball on the top of the belly and poke around the edges to attach.
Allow to raise about 15 minutes and then bake until golden brown!(375 degrees)

They come out all cute and puffy!

And there you have them-  turkey dinner rolls.
And there you have them- turkey dinner rolls.
For Thanksgiving!

Roll recipe- makes about 3 dozen rolls.
Ingredients;
6 cups all purpose flour
1 1/2 cups milk ,scalded in microwave (about  2 min on high)
1 stick butter or margarine
2 eggs
1/2  cup sugar
1 Tbs salt
2 Tbs yeast
1 cup warm water
scant tsp sugar
Method:
Put flour, sugar and salt into large bowl and whisk together- form well in center of flour.  Melt butter or margarine in the hot milk and set aside.  Proof yeast (mix  together yeast and sugar, stir in water and watch for growth reaction- it should start growing  almost immediately).  Beat eggs and pour into well, add milk mixture (butter should be completely melted) and stir until the flour and liquid are one mass.  Add proofed yeast-(  if the yeast didn’t raise ,proof another batch, either it is too old or your water was too hot) and mix the whole mess into a sticky dough!  Flour counter, dump dough onto flour , add some more on your hands and knead for at least 10 minutes.  This is a Big ball of dough so put your muscles into it.  Grease large bowl, form dough into a ball and allow to raise, covered, for at least an hour , until doubled in volume.  Cut ball in half and roll into large circle.  Form your rolls and enjoy! 
Don’t forget to be thankful – I usually pray while making these- it makes the whole experience Totally worthwhile!

A recipe repeat-Fennel and Celeriac soup with apples and almonds

I put this up about 2 years ago on my Livejournal blog- but it is so good it bears repeating.  (Besides,Joanna @ Zebbakes asked for the recipe .)

This is a great month to look at root veggies- turnips, beets, potatoes and celery root or celeriac. If you make this- please let me know!

This is one of my ALL- TIME favorite soups.  It is a very old recipe from the North Umberland region of England- and- honestly , I have never had a soup more remarked upon or enjoyed.  It is easy to make although a little expensive and rich.  Try it- you really won’t be sorry.
Ingredients:
I medium bulb of fennel (also called anise)
I medium celeriac (also called celery root)
I medium onion
I large Granny Smith apple
1/2 cup ground roasted almonds
2 cups broth(chicken or vegetable)
I pint half and half
salt and pepper to taste
Method:
Cut vegetables and apple into chunks(medium size)  put into large pot, add broth and simmer until everything is cooked through.  Put into food processor or blender and whip until smooth.  Put back into pot, add almonds and S+P and half and half.  Heat through- you can bring to simmer , but do not boil once the cream has been added.  Sprinkle with almonds and a little allspice if you’d like.  This is just so good with a green salad and crusty bread.

——————————————————————————————————————————–

Update!

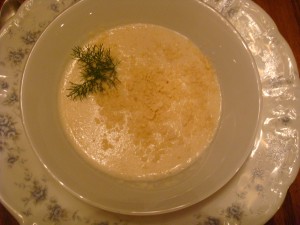
Here’s a picture of the finished soup.  It was perfect as an appetizer for our meal.

Fancy Cashew Brittle- Microwave- easy! No picture- just the recipe!

Ingredients:

2 cups  roasted salted cashew halves

1 cup granulated sugar

1/2 cup light corn syrup

1 tsp butter

1 tsp vanilla

1 tsp baking soda


Method:

In 2 quart microwave safe bowl, stir together nuts, sugar and syrup.  Microwave, uncovered for 6 to 8 minutes at high- stop after 3 minutes, stir well- continue cooking for 3 to 4 minutes- mixture should be light brown.  While mix is in microwave, prepare a large cookie sheet with either parchment paper or grease well.

Mixture will be VERY HOT- take from oven and stir in butter and vanilla.  Continue to microwave at high another 2 minutes- mixture should be caramel colored.  Remove from microwave and add baking soda.  Stir quickly until light and foamy and soda is thoroughly mixed in.  Immediately pour onto baking  sheet and spread out as quickly as possible.  Let brittle stand 30 minutes or until cool – then break into pieces. 

To coat in chocolate- put half of desired amount of chocolate into microwave safe container.  Melt on high for 1 minute- take out and stir- if chocolate is melted, add the remaining pieces and stir them in to melt into the already melted chocolate (if the first batch wasn’t completely melted- repeat process using 30 second increments until melted)- then dip cashew brittle into chocolate and coat.

A basketful of quince…

quince and 'shroom 002

I picked them several weeks ago.

And they didn’t look very good then.

And then- life got very busy.

I was preoccupied with knitting.

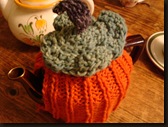
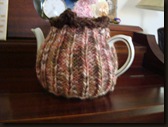
Mainly socks- but a couple of cosies got into the basket as well.

apple picking and tractor tale 028 quince and pocketbook treasures 004socks, yarn, L fairy 002

crafts and cozies 003 crafts and cozies 014

And then the baby was born- and I got to be resident Grandma most of this week!

Luke's Apples, Leaves and Baby 463 Luke's Apples, Leaves and Baby 520 Luke's Apples, Leaves and Baby 507

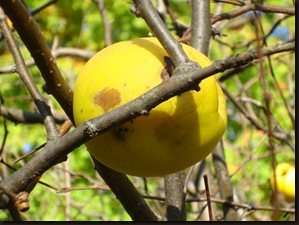
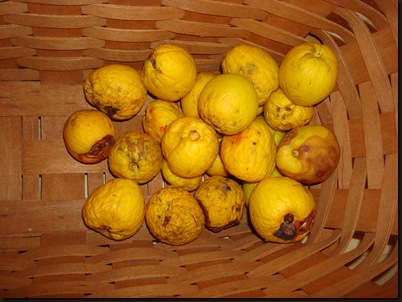
So when I came home today, and smelled a sweet and earthy smell in my kitchen- I found this basket of wrinkly quinces.

quince and pocketbook treasures 003

-wrinkled and browning-

Which I intend to make into pickled quinces, tomorrow.

Here’s the recipe Robin and I found at least 16 years ago- in hopes, someday of having a bumper crop of quinces.  We never did.  So we never made it.

This is the year of the pickled quince!

Ingredients:

6-7 quinces

15  fluid oz. cider vinegar

1 1/2 lbs sugar

rind of one lemon

3 whole cloves

2 cinnamon sticks

1 inch piece of ginger root

1 allspice berry

2 vanilla beans

Method:

Put the vinegar, sugar and lemon rind into an enameled saucepan.  Wrap the spices in a muslin/cheesecloth bag and add to the pan.  heat until sugar dissolves, cover and simmer10 minutes.

Peel and core quinces and quarter.  Add them to the pickling juice.  Simmer for about 1 hour, or until quinces are soft but still hold their shape.  Cool in the liquid.  Strain quinces and place in a clean preserving jar.  Bring the liquid to a rapid boil and cook until reduced by half.  Pour over the fruit which should be completely immersed.

Place the 2 vanilla beans in the jar and cover tightly.

Keep a month before using.

I’ll let you know how they turn out.

Does anyone know what you use pickled quince for?  I’m thinking it would be like an appetizer, something akin to watermelon rind pickles.

I wish I remembered WHY we were so anxious to make these.

They sure have a lot of good spices in them.

quince and pocketbook treasures 008

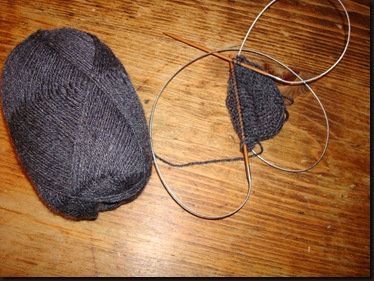
I want to get them done so I can go back to these socks-

bamboo and wool in a charcoal grey!

———————————-UPDATE———————————————–

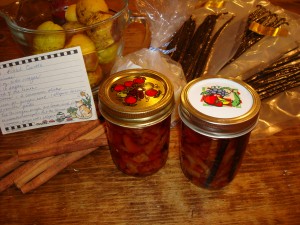
pickled quince x 2

I got two jars and only one blister!

The quince was really a pain- most of it was thrown away!  But I ended up with two small jars and I’m happy with that!

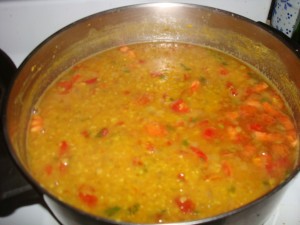
Dhal- or what I have been calling spicy Indian soup for years!

And I made soup from a link Celia had on her blog- Fig Jam and Lime Cordial.

I can’t figure out how to put up the link from this update area, but look on the blog list on my sidebar

and you will find her!

I love this soup- I lost my recipe I had been following before!  And I just discovered this has a great

glycemic index for diabetics!  Yes!  I love it when a plan comes together! (cue A-Team music)

Scenic Ridge Apple Orchard- Ripe for picking!(and picnicking)

 apple picking and tractor tale 001

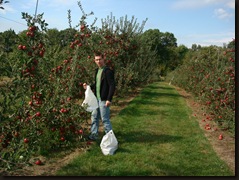
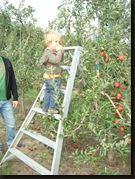
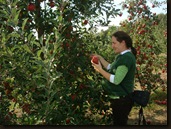
We got a hay ride out to where our favorite apples were growing.

apple picking and tractor tale 005apple picking and tractor tale 004 apple picking and tractor tale 040

The trees were heavily burdened with Melrose apples.

apple picking and tractor tale 041 apple picking and tractor tale 042

apple picking and tractor tale 017 apple picking and tractor tale 019  apple picking and tractor tale 008

It was a beautiful day even though the forecast was for rain and cold.


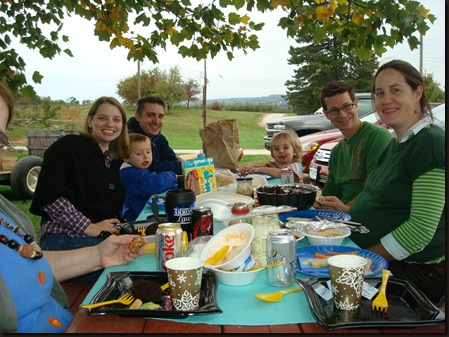
This is the third year in a row we have gone here to pick apples and celebrate Luke’s birthday and have a great picnic.  I love our picnics, we all bring our favorites and it ends up being perfect!.

I made bread ( sourdough and whole wheat ) and West African Chicken soup and cruditees, Willow brought pate` and ham and crackers and chocolate zuchinni cake with ganache icing and Ally brought cheese and flat pretzels and artichoke dip- it was a wonderful Fall picnic.

apple picking and tractor tale 023 

I had Jordan take some pictures of the group.

Actually, I asked him to take some pictures of the table and got two shots of the table cloth before I told him to get serious and take a picture of our family!

I forgot to take any pictures of the food, however.

It was good.

Here is a recipe for West African Chicken soup.

I got this recipe from Allyson, who I think got it from her sister in law, Kymi- where Kymi got it from I don’t know- but I think you will like it!

Ingredients:

1 onion, diced

2 boneless chicken breasts, cubed

3 TBSPS Sesame Oil

2 1/2 to 3 cups diced tomatoes

4 cups chicken broth

1/2 cup peanut butter

3 TBSPS tomato paste

1 tsp cayenne pepper

Salt and pepper, to taste

Method:

Saute onions and chicken in sesame oil, until onions are translucent and chicken is no longer pink.  Add tomatoes and simmer on low for 15 minutes, add chicken broth and continue simmering for another 15-20 minutes.  Add tomato paste and stir well.  Add peanut butter  and cayenne pepper along with s+p- simmer for another 10-15 minutes,but do NOT allow to boil.  Serve with chopped peanuts for a garnish and extra hot sauce for the fiery hot lovers in your group.

This is a great soup for a coolish day.